 Wiga Tap Manufacturer
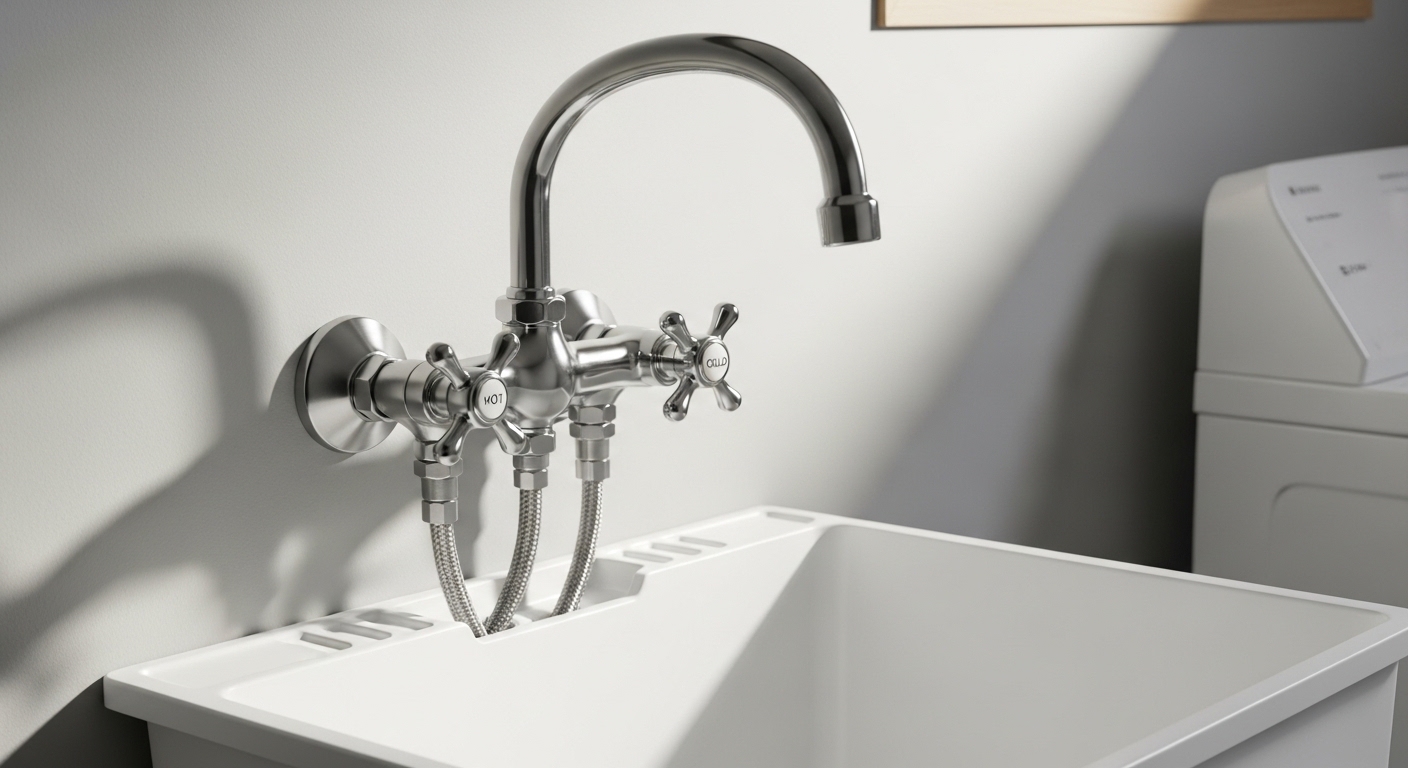
A laundry faucet installation is one of the most beginner-friendly plumbing jobs in the whole house — far easier than a kitchen faucet — because a laundry (utility) faucet lives in a low-stakes, high-tolerance spot: a garage, basement, or laundry room where a drip won’t ruin a countertop and where the connections are usually right out in the open. If you can turn a wrench and wrap tape around a thread, you can do this. Below, we’ll walk through every real scenario people ask about — wall-mount vs. deck-mount, replacing an old two-handle unit, adding a faucet to a utility sink that never had one — plus the exact parts, torque, and leak-testing steps that separate a clean install from a callback.
What exactly is a laundry faucet, and how is it different from a kitchen faucet?
A laundry faucet (also called a utility or service faucet) is a rugged, no-frills faucet built for a slop sink or wash tub — typically with a threaded spout so you can screw on a garden hose, two simple handles for hot and cold, and a higher, more open spout arc for filling buckets. The key difference from a kitchen faucet is durability over looks: laundry faucets use heavier brass or thermoplastic bodies, wider spouts, and are often mounted directly to the wall on 4-inch or 8-inch centers.
Because they’re so utilitarian, the installation is more forgiving. There’s no deck plate to align perfectly, no pull-down hose to thread, and no under-cabinet contortion. Most laundry faucets are either wall-mounted (bolted straight into the studs or onto pipe stubs coming out of the wall) or deck-mounted on the rim of a plastic utility tub. Knowing which type you have decides everything about the install, so let’s break both down.
Wall-mount vs. deck-mount vs. laundry tub faucet — which one do I actually have?
Look at where your existing faucet (or the water stubs) come from. If the pipes come out of the wall behind the sink, you need a wall-mount faucet sized to your center distance. If the faucet sits on the back rim of the tub, you need a deck-mount unit sized to the pre-drilled holes.
| Faucet Type | Mounts To | Typical Center Distance | Best For | Install Difficulty |
|---|---|---|---|---|
| Wall-mount utility faucet | Pipe stubs / studs in wall | 4″ or 8″ on-center | Basements, garages, exposed plumbing | Easy–Moderate |
| Deck-mount (2-hole) | Rim of utility tub | 4″ spread | Freestanding plastic wash tubs | Easy |
| Deck-mount (single-hole) | Rim of tub or countertop | 1 hole | Compact laundry sinks | Very Easy |
| Freestanding / floor-mount | Floor riser pipes | Varies | Commercial / mop sinks | Moderate |
Measure the center-to-center distance between your two water lines before you buy anything. A 4-inch faucet will not bolt onto 8-inch stubs, and mismatched centers are the #1 reason people make a second trip to the store. If your utility sink is a shared setup with washer hookups, double-check that the faucet’s supply connections are ½-inch — the same standard used across most residential fittings, which we cover in our guide to the right faucet supply line dimensions for your sink.
What tools and parts do I need for a laundry faucet installation?
You need surprisingly little: an adjustable wrench (or channel-lock pliers), PTFE plumber’s tape, two braided stainless steel supply lines, a bucket, and a towel. That’s the entire kit for 90% of laundry faucet swaps. If you’re mounting to a plastic utility tub, add a basin wrench and a bead of silicone.
Here’s the complete checklist so you only make one trip:
- Adjustable wrench — for the supply-line nuts and mounting nuts.
- Channel-lock / tongue-and-groove pliers — for gripping the faucet body while you tighten.
- PTFE (Teflon) plumber’s tape — 3–4 wraps clockwise on every threaded male connection.
- Braided stainless steel supply lines — pick lengths ~4 inches longer than the gap; never reuse old, kinked ones.
- Basin wrench — only if you’re reaching up behind a deck-mount tub.
- 100% silicone sealant — for bedding a deck-mount faucet base.
- Bucket + rag — to catch the water still sitting in the lines.
- Thread-seal compound (pipe dope) — optional, for metal-to-metal wall stub threads.
One quality note before you buy: it’s tempting to grab the cheapest utility faucet on the shelf, but a $12 faucet with a pot-metal body and rubber washers will drip within a year and strip at the threads. Spend a little more on a solid brass or heavy thermoplastic body. If you want the full argument on why bargain fixtures cost more in the long run, our dealers make the case in why you should never buy cheap bathroom fixtures.
How do you replace an existing laundry faucet step by step?
To replace an old laundry faucet: shut off the water, open the faucet to relieve pressure, disconnect the supply lines, unbolt the old faucet, mount the new one, reconnect the lines with fresh tape, then turn the water back on slowly and check for leaks. Start to finish, it’s about 45–90 minutes.
Here’s the full sequence:
- Shut off the water. Use the local shutoff valves under or behind the sink. No local valves? Shut off the main and open a lower faucet to drain the line.
- Relieve pressure and drain. Open both faucet handles fully so any trapped water and pressure escapes into the sink. Keep the bucket handy.
- Disconnect the supply lines. Loosen the compression nuts where the hoses meet the shutoff valves. Water will dribble out — that’s normal. Cap or aim the lines into the bucket.
- Remove the old faucet. For wall-mount, unthread the faucet from the pipe stubs (turn counterclockwise). For deck-mount, unscrew the mounting nuts underneath with your basin wrench and lift the faucet out.
- Clean the mounting surface. Scrape off old putty, silicone, or mineral crust from the stubs or tub rim so the new faucet seats flush.
- Wrap the threads. Apply 3–4 clockwise wraps of PTFE tape to every male thread — wall stubs, spout, and shanks.
- Mount the new faucet. Thread it onto the stubs hand-tight, then snug it a quarter to half turn past hand-tight with a wrench until the handles point straight up. Don’t overtighten and crack the casting.
- Connect fresh supply lines. Hand-thread each braided hose, then tighten a further ⅔ turn with a wrench. Snug, not gorilla-tight.
- Turn water on slowly. Reopen the shutoffs gradually and watch every joint.
- Leak-test. Run hot and cold for 60 seconds, feel every connection with a dry finger, and check again after 10 minutes.
The core skills here — taping threads, seating a faucet, and connecting braided lines without cross-threading — are identical to installing a bathroom faucet. If you want a parallel walkthrough with photos of the under-sink connections, our install a bathroom vanity faucet in under 2 hours guide covers the same fundamentals in a deck-mount context.
How do I install a laundry faucet on a utility tub that never had one?
If your plastic utility tub has pre-molded knockout holes but no faucet, you’re adding a deck-mount unit: pop or drill out the knockouts to the faucet’s spec, drop the faucet shanks through, secure with the mounting nuts from below, then run supply lines to your shutoff valves. Budget about an hour.
The one gotcha with plastic tubs is the thin, flexible deck. Over-tightening the mounting nuts will flex or crack the plastic, so tighten only until the base stops rotating and add a rubber gasket (usually included) between the faucet and the tub. Bed the base in a thin ring of 100% silicone for a watertight seal that also stops the faucet from twisting when you crank the handles.
Do I need a plumber, or can I really do this myself?
For a straight swap or a deck-mount tub faucet, you almost never need a plumber — the connections are threaded, accessible, and low-pressure. You’d only call a pro if you need to add new water lines through a finished wall, move the plumbing, or if there’s no shutoff valve and your main valve is seized. Those jobs involve soldering or opening drywall, which is a different skill level.
Here’s an honest cost breakdown so you can decide:
| Scenario | DIY Cost | Pro Cost (parts + labor) | Time | Recommendation |
|---|---|---|---|---|
| Replace existing wall-mount faucet | $25–$90 (faucet only) | $150–$300 | 45–90 min | DIY |
| Add deck-mount to utility tub | $30–$100 | $180–$350 | ~1 hour | DIY |
| Add new water lines in wall | $100+ (materials, risky) | $400–$900 | Half day+ | Hire a pro |
| No shutoff / seized main valve | — | $250–$500 | Varies | Hire a pro |
If your existing shutoff valves are old, corroded, or weep when you touch them, replace them while you have the water off — it’s a five-minute add-on that saves you a future headache. And if you’re not sure which supply connector your setup uses, sizing it correctly matters; brands vary, as we explain in our breakdown of what size a faucet water supply line is and which connector you need.
What are the most common laundry faucet installation mistakes?
The top three mistakes are: not shutting off the water first (obvious, but it happens), over-tightening plastic or brass and cracking it, and reusing old braided supply lines that are already fatigued. Any of these turns a 1-hour job into a mop-up session.
Watch out for these specific traps:
- Cross-threading the supply nuts. Always start every threaded connection by hand and back it off if it resists — forcing a wrench on a crossed thread ruins the fitting.
- Skipping the leak test window. A joint can look dry at minute one and weep at minute ten as pressure equalizes. Wait and re-check.
- Wrapping PTFE tape the wrong way. Wrap clockwise (as you look at the thread end) so tightening the nut doesn’t unravel it.
- Using the wrong center-distance faucet. Measure before you buy — 4″ vs. 8″ centers are not interchangeable.
- Forgetting the freeze risk. Utility faucets in unheated garages and basements can freeze. If yours is exposed, know your winter protection options — our guide on whether to leave a faucet dripping to prevent freezing pipes covers exactly how much drip actually helps.
How do I leak-test and finish the job properly?
After you turn the water back on slowly, run both hot and cold for a full minute, then dry every joint with a paper towel and press it against each connection — a wet towel reveals leaks your eye misses. Re-check after 10 minutes and again the next morning before you call it done.
If you find a slow weep at a threaded joint, don’t just crank harder — that often makes it worse. Shut off, back the fitting off, add another wrap or two of tape, and reseat it. For compression fittings at the shutoff valve, a gentle ⅛-turn snug is usually all it takes. A properly installed laundry faucet should hold at typical residential pressure (40–80 psi) indefinitely with zero drips.
Why is my new laundry faucet dripping from the spout after install?
A drip from the spout (not the connections) after a fresh install usually means trapped air or debris in the cartridge or washers, or a handle that isn’t fully closing. Run the faucet wide open for 30 seconds to flush out pipe debris, then close firmly. If it still drips, the internal washer or cartridge may be seated wrong — remove the handle, check the cartridge orientation, and reseat it.
This is the same troubleshooting logic used across all faucet types: a spout drip is almost always an internal seal issue, while a base or connection drip is a threading issue. If you ever move on to a filtered-water setup and see similar dripping there, the diagnostic path is nearly identical to our reverse osmosis faucet cartridge replacement walkthrough.
FAQ
How long does a laundry faucet installation take?
For a straightforward replacement of an existing faucet, plan on 45 to 90 minutes including leak testing. Adding a deck-mount faucet to a utility tub for the first time takes about an hour. Running brand-new water lines through a wall is a half-day-plus job best left to a plumber.
Do I need special connectors for a utility sink faucet?
No — almost all residential laundry faucets use standard ½-inch supply connections and standard braided stainless steel hoses. Just confirm your center distance (4″ or 8″ for wall-mount) and match your shutoff valve outlet size. If your setup shares hookups with a washing machine, verify the connector type before buying.
Can I install a laundry faucet without shutting off the main water?
Yes, if you have working local shutoff valves at the sink — close those, and you can work while the rest of the house keeps water. Only shut off the main if there are no local valves or if the local valves are corroded and won’t fully close. Always open the faucet afterward to relieve pressure before disconnecting anything.
What’s the difference between a laundry faucet and a hose bibb?
A laundry (utility) faucet is a full mixing faucet with separate hot and cold handles and a swing or threaded spout for a wash sink. A hose bibb is a single-supply outdoor spigot with one handle, usually cold water only, meant for garden hoses. Some laundry faucets have a threaded spout so you can attach a hose, which blurs the line, but they’re plumbed for both hot and cold.
Should a laundry faucet be brass or plastic?
A solid brass body is the more durable choice for frequent use and higher heat, and it resists thread stripping far better than pot metal. Heavy-duty thermoplastic (like reinforced polypropylene) is a legitimate budget option for light-use tubs and won’t corrode, but avoid thin, cheap zinc-alloy faucets — they crack at the threads and drip within a year. For a workhorse utility faucet, brass is worth the small premium.
How do I know if my install passed inspection standards?
For residential DIY, “passing” means no leaks under full pressure, secure mounting with no wobble, and hot on the left / cold on the right. If you’re installing in a commercial or code-inspected setting, look for faucets certified to NSF/ANSI 61 and 372 (lead-free) and check your local plumbing code for any backflow-prevention requirement on threaded utility spouts. A good faucet will list these certifications and carry a manufacturer warranty.
A note on expertise, testing, and warranty
Author: This guide was written by the wigafaucet product team, drawing on hands-on installation of hundreds of residential and light-commercial utility faucets. We’ve done the wall-stub swaps, the cracked-plastic-tub reseals, and the seized-shutoff-valve surprises — so the steps above reflect what actually happens on the job, not just the box instructions.
About wigafaucet: wigafaucet is a dedicated faucet and bathroom-fixtures brand engineering kitchen, bath, and utility faucets for durability first. Our laundry and utility faucets use lead-free brass and heavy thermoplastic bodies, are tested to NSF/ANSI 61 and 372 standards for drinking-water safety, undergo pressure-cycle and leak testing before shipping, and are backed by a manufacturer warranty on the finish and internal cartridge. If you ever hit a problem an article can’t solve, our support team walks you through it — because a faucet you can install confidently and trust for years is the whole point.