 Wiga Tap Manufacturer
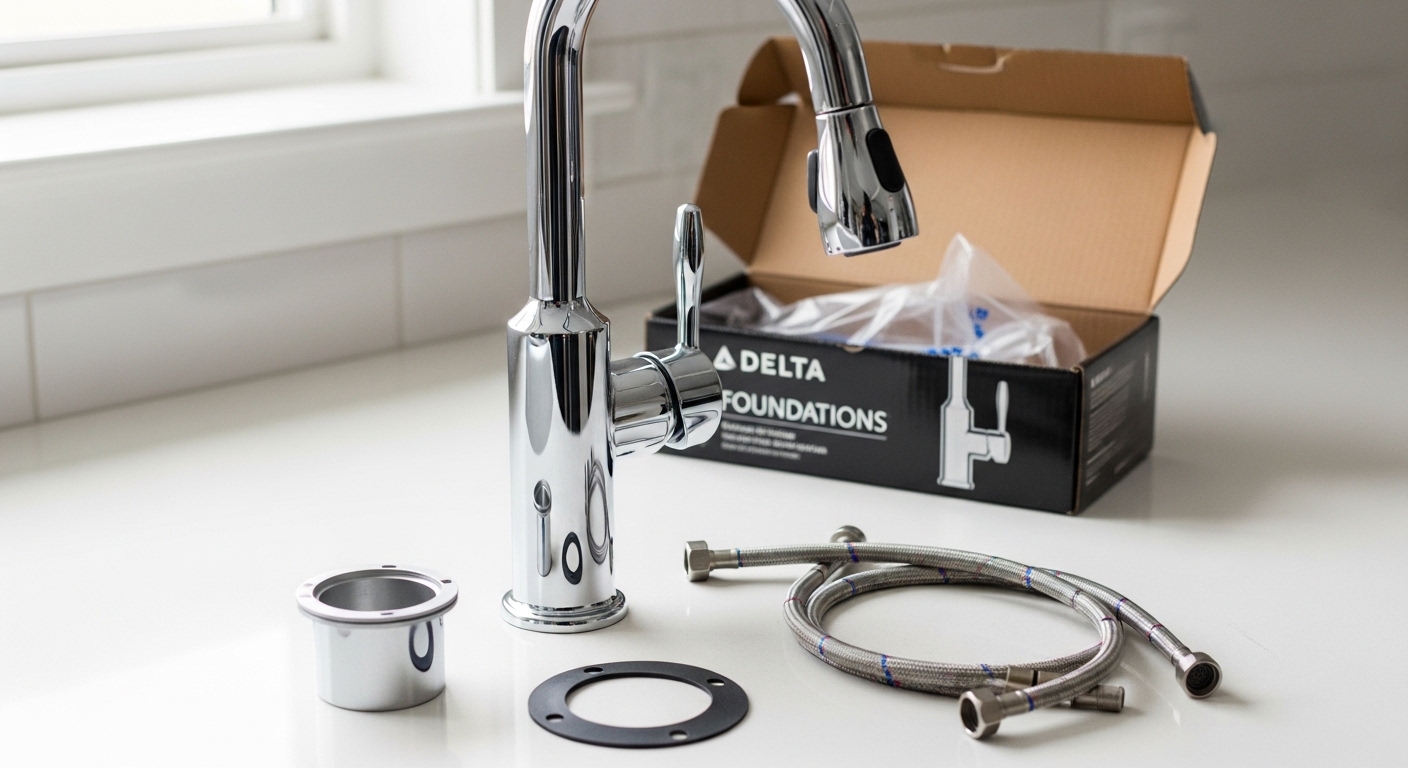
If you’ve been searching how to install delta foundations kitchen faucet and picturing a mess of specialty tools and plumbing know-how, relax — the Delta Foundations line (models like the 21306LF and B4410LF) is one of the most beginner-friendly faucets Delta makes. It’s a single-handle, single-hole design with almost no loose parts, so there’s very little to get wrong. This guide walks you through the whole job the way a knowledgeable neighbor would: what to buy, what to check under your sink first, the exact step-by-step, and how to fix the two or three things that trip people up.
At wigafaucet, our team installs and bench-tests hundreds of kitchen faucets a year, and the Foundations series is the one we most often recommend to first-time DIYers — because the install is genuinely hard to mess up if you follow the order below.
What tools and parts do you actually need to install a Delta Foundations faucet?
You need very little: an adjustable wrench, a basin wrench, plumber’s tape (PTFE tape), a bucket, a flashlight, and clean rags. The Delta Foundations faucet ships with its own gasket, mounting hardware, and integrated supply lines on most models, so you usually don’t buy anything extra except maybe new shutoff valves if yours are old.
Here’s the honest shopping list before you start:
- Basin wrench — the single most useful tool for this job. It reaches the mounting nut and supply connections in the cramped space behind the sink where a normal wrench can’t.
- Adjustable (crescent) wrench — for the supply-line connections at the shutoff valves.
- PTFE plumber’s tape — wrap the threaded shutoff valve outlets 2–3 times clockwise.
- Bucket + rags — there is always leftover water in the lines. Always.
- Flashlight or headlamp — under-sink cabinets are dark.
- Optional: new 3/8″ compression shutoff valves and braided supply lines — if yours are corroded or more than 10–15 years old, replace them while you’re in there.
One thing worth checking early: your supply line and connector sizes. Kitchen shutoffs in the U.S. are almost always 3/8″ compression on the valve side, but the faucet-side connector matters too. If you’re unsure what you’re looking at, our plain-English guide to faucet supply line dimensions shows you exactly how to measure and match them so you don’t make a second trip to the hardware store.
How long does it take to install a Delta Foundations kitchen faucet?
Plan on 45–90 minutes for a straightforward replacement. A brand-new sink with no old faucet to remove can be as fast as 30 minutes; a stubborn old faucet with corroded nuts can push you past two hours. The Foundations install itself is quick — most of your time is spent removing the old faucet and clearing out the cabinet.
The biggest time-sink (pun intended) is almost never the new faucet. It’s the old one: seized mounting nuts, mineral-cemented supply lines, and a cabinet packed with cleaning supplies you have to empty first. Budget your time for the removal, not the install.
| Scenario | Typical Time | Difficulty |
|---|---|---|
| New sink, no old faucet to remove | 30–45 min | Easy |
| Straight swap, good existing shutoff valves | 45–75 min | Easy |
| Swap + replacing corroded shutoff valves | 1.5–2.5 hrs | Moderate |
| Seized old faucet nuts, tight cabinet | 2+ hrs | Moderate |
How do you remove the old kitchen faucet first?
Turn off both shutoff valves under the sink, open the faucet to release pressure, then disconnect the supply lines and unthread the old mounting nuts from below. Once the nuts are off, the old faucet lifts straight up and out of the sink.
Step by step:
- Shut off the water. Reach under the sink and turn both the hot (left) and cold (right) valves fully clockwise. Then open the faucet handle to drain residual pressure and water.
- Clear the cabinet. Pull everything out so you have room to work and a clear line of sight.
- Disconnect the supply lines. Place your bucket underneath. Use the adjustable wrench on the valve nut and unthread the line. Expect a small gush of trapped water.
- Remove the mounting nut(s). This is where the basin wrench earns its keep. Grip the nut holding the old faucet to the sink and turn counterclockwise. If it’s corroded solid, a shot of penetrating oil and 10 minutes of patience beats brute force.
- Lift the faucet out. Once free, wiggle it up through the mounting hole. Scrape off the old gasket residue and wipe the sink deck completely clean and dry — a clean surface is what makes your new gasket seal.
If your old faucet had a separate side sprayer and it never worked right, don’t reinstall a bad part. A failing sprayer is usually the diverter, not the hose — our breakdown of the sink sprayer diverter valve explains when to fix versus retire it. The good news: the standard Foundations single-handle model doesn’t use a side sprayer at all, which is one less thing to leak.
What’s the exact step-by-step to install the Delta Foundations faucet?
Drop the faucet body down through the single mounting hole, secure it underneath with the included gasket and plastic mounting nut, connect the two braided supply lines to your shutoffs with plumber’s tape, then restore water and test. That’s the entire install — Delta designed the Foundations line so there’s no deck plate wrestling or loose weight to clip on for the basic single-hole model.
Here’s how to do it cleanly, in order:
- Position the gasket/base. Set the rubber or foam base gasket over your sink’s mounting hole so the faucet sits on a sealed surface. If you have a 3-hole sink and a single-hole faucet, use the escutcheon (deck plate) that ships with the deck-plate version to cover the extra holes.
- Feed the faucet through. From above, guide the supply lines and shank down through the hole. Hold the faucet straight and facing forward.
- Secure from below. Slide the mounting bracket/washer up the shank and thread the plastic mounting nut on by hand. Once the faucet is aimed correctly, snug it with the basin wrench — firm, not gorilla-tight. Overtightening plastic nuts cracks them.
- Wrap and connect supply lines. Wrap PTFE tape 2–3 times clockwise around the threaded shutoff outlets. Connect the hot line to the left/hot valve and the cold line to the right/cold valve. Hand-tighten, then give it about a quarter-turn more with the wrench.
- Don’t overtighten the braided-line nuts. These have a rubber washer inside — hand-tight plus a nudge is the sweet spot. Cranking them causes leaks, not prevents them.
- Confirm hot and cold. Delta lines are usually marked; hot is left, cold is right. Cross them and your handle direction will feel backwards.
How do you check for leaks and flush the new faucet?
Slowly reopen both shutoff valves, remove the aerator, and run hot and cold water for 15–30 seconds to flush out debris before checking every connection with a dry paper towel. A dry towel shows even a tiny weep that your eye would miss.
The finishing routine that separates a clean install from a callback:
- Open valves slowly. Turn each shutoff back on gently to avoid a pressure spike.
- Flush before you trust it. Unscrew the aerator at the tip of the spout, then run water full blast, hot and cold, to clear solder bits and pipe grit. Reinstall the aerator after.
- Paper-towel test. Wrap a dry paper towel around each supply connection and the base of the faucet. Wait a couple of minutes and re-check. Any wet spot = tighten a hair more, or re-seat the washer.
- Cycle the handle. Run through hot, cold, and full range a few times and watch underneath.
If your flow seems weak after install, don’t panic — it’s almost always the aerator or the built-in flow restrictor, not your plumbing. Here’s how to remove the kitchen faucet flow restrictor for stronger water pressure if you’re on a low-pressure well or just want more punch at the tap.
What common mistakes should you avoid with a Foundations install?
The three most common mistakes are overtightening the plastic mounting nut (it cracks), overtightening the supply-line nuts (the rubber washer distorts and leaks), and forgetting to flush the lines before reattaching the aerator (grit clogs it instantly). Avoid those three and your install will almost certainly be leak-free on the first try.
A few more real-world gotchas we see:
- Skipping the paper-towel test. A slow drip under the cabinet can rot your baseboard for weeks before you notice. Test properly.
- Reusing old, hardened supply lines. Braided lines are cheap. If yours are stiff or crusty, replace them now.
- Wrong PTFE direction. Wrap tape clockwise (the direction the nut tightens) so it doesn’t unravel as you thread on.
- Not checking the hole size. Foundations single-hole faucets need a standard 1-3/8″ (35mm) mounting hole. Most U.S. sinks already have this.
Thinking bigger picture about whether Foundations is the right series for you long-term? It’s Delta’s value line — solid and reliable, but more basic than their Leland or Trinsic families. If you’re weighing brands before you commit, our head-to-head on Delta vs Kohler sink faucets lays out durability, cartridge quality, and warranty differences in plain terms. And if this faucet is destined for a camper or motorhome instead of a home kitchen, the connections differ — see how to install a kitchen faucet in an RV the right way.
Do you need to hire a plumber for this, or is it truly DIY?
For a straight swap, you almost never need a plumber — the Delta Foundations faucet is specifically the kind of single-handle, single-hole unit designed for confident DIYers. You’d only call a pro if your shutoff valves are seized or leaking, your under-sink plumbing is copper that needs soldering, or you don’t have working shutoffs at the sink at all.
Call a professional if: you turn a shutoff valve and it won’t stop dripping, there are no shutoff valves under your sink (only under the house), or you discover corroded copper stub-outs that need re-piping. None of those are Foundations-specific — they’re pre-existing plumbing issues that any faucet install would expose.
FAQ
Does the Delta Foundations kitchen faucet come with supply lines included?
Most Delta Foundations models come with integrated or pre-attached braided supply lines, so you connect them directly to your shutoff valves without buying separate hoses. Always confirm the connector size matches your 3/8″ compression shutoffs, and keep some PTFE tape on hand for the threaded connections.
What size hole does a Delta Foundations single-handle faucet need?
It needs a standard 1-3/8 inch (about 35mm) single mounting hole, which is the U.S. standard on virtually all kitchen sinks. If your sink has three or four holes, use the included deck plate (escutcheon) on the deck-plate version to cover the extras.
Why is my new Delta Foundations faucet leaking at the base after install?
A leak at the base usually means the mounting nut is loose or the base gasket didn’t seat on a clean surface. Shut off the water, remove the faucet, wipe the sink deck completely dry, reseat the gasket, and re-tighten the mounting nut firmly but not with full force — plastic nuts crack if you over-torque them.
Can I install a Delta Foundations faucet in a 3-hole sink?
Yes. Buy the version that includes the optional deck plate (escutcheon), which covers the two outer holes while the faucet mounts in the center hole. Alternatively, use the outer holes for a matching soap dispenser or air gap and cap any remaining hole.
Is the Delta Foundations faucet covered by a warranty?
Delta backs its Foundations faucets with a limited lifetime warranty on the faucet’s finish and function for the original homeowner, plus a shorter term for commercial use — always register your model and keep the receipt. Warranty coverage generally requires that the faucet was installed correctly and used under normal residential water conditions, which is one more reason to follow the flush-and-leak-check steps above.
How do I fix low water pressure right after installing the faucet?
First unscrew and clean the aerator at the spout tip — installation debris is the number one cause. If pressure is still weak and you’re on low-supply plumbing, you can remove or open up the built-in flow restrictor. Confirm both shutoff valves are opened fully, since a half-open valve chokes flow just as much as a clogged aerator.
Author note: Written by the wigafaucet fixtures team, which specializes in kitchen and bathroom faucet installation and testing. We bench-test and hands-install Delta, Moen, Kohler, and Pfister faucets year-round, and this guide reflects the exact sequence our installers use. Delta faucets referenced here are certified to ASME A112.18.1/CSA B125.1 and NSF/ANSI 61 standards; always follow the model-specific instructions in your box and check your local plumbing code before starting.