 Wiga Tap Manufacturer
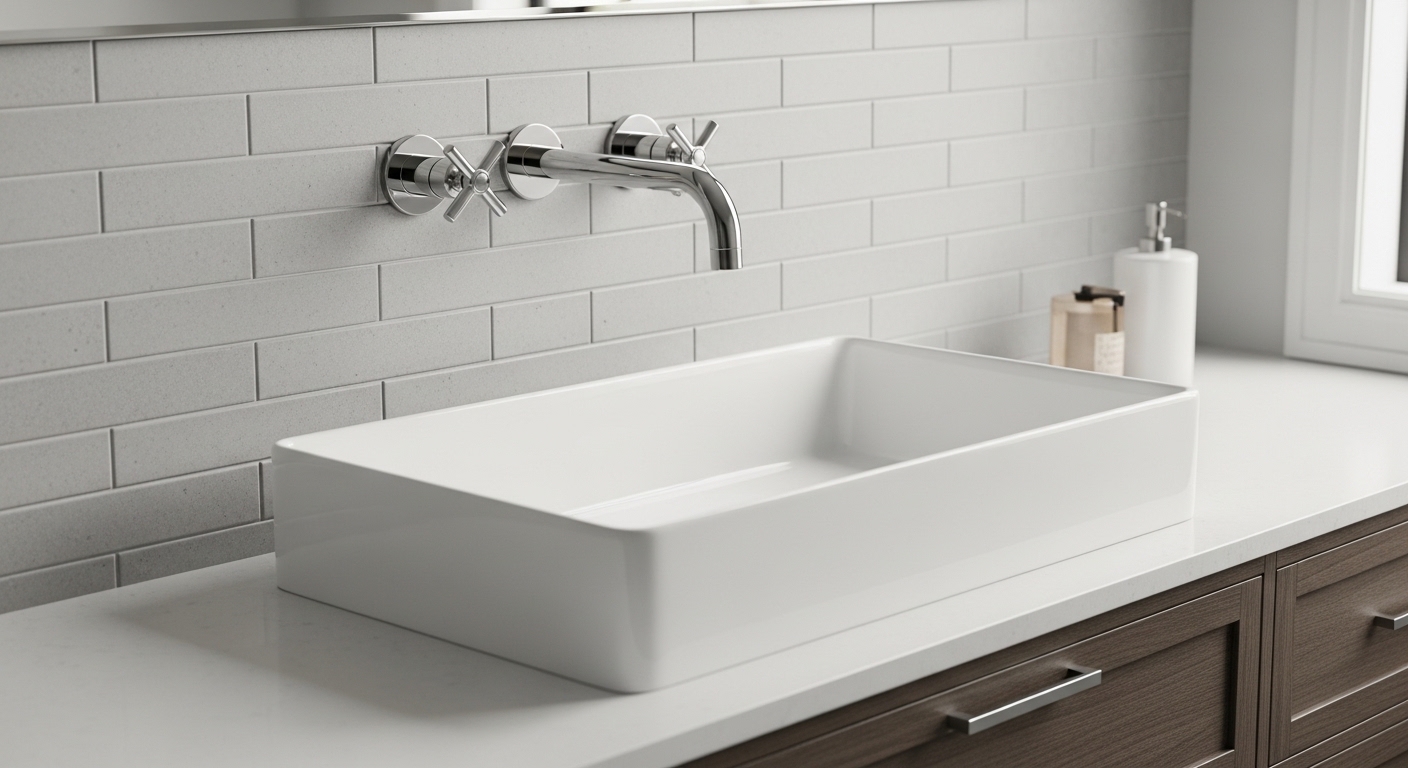
If you’re wondering exactly how to install a Kohler wall mount faucet, the honest answer is that it’s really two jobs, not one: the rough-in (the valve and supply lines hidden inside the wall) and the trim-out (the handles, spout, and escutcheons you see). Most people who run into trouble do so because they treat it like a standard deck faucet and only think about it after the wall is finished. Get the rough-in right and the visible part is genuinely easy. This guide walks you through both stages in plain English, with the real measurements, tools, and gotchas that Kohler’s own instruction sheets assume you already know.
Wall mount faucets — where the spout and handles come straight out of the wall instead of sitting on the sink deck or countertop — have surged in popularity for vessel sinks, freestanding tubs, and clean minimalist vanities. They look fantastic, but they demand more planning than a drop-in faucet. Let’s get into it.
What tools and parts do you need before you start?
Before you touch a wrench, gather the rough-in valve, the trim kit, and a specific short list of tools — a wall mount faucet install stalls fast if you’re missing the right fittings mid-job. Kohler typically ships the valve body and the finished trim separately (and sometimes sold separately), which trips up first-timers who open one box and assume parts are missing.
Here’s what you’ll want on the bench:
- Kohler rough-in valve body — the brass in-wall component; check the model number matches your trim kit.
- Trim kit — handles, spout, and escutcheon plates in your chosen finish (polished chrome, brushed nickel, matte black, etc.).
- Adjustable wrench and a set of Allen/hex keys — most Kohler trim uses set screws.
- Plumber’s tape (PTFE) and pipe thread sealant for threaded connections.
- Tube cutter, and either a soldering torch or PEX/SharkBite fittings depending on your supply lines.
- Level, tape measure, and a stud finder.
- Silicone caulk to seal the trim against the finished wall.
One critical spec: confirm your supply line size and connections before you buy adapters. If you’re unsure what feeds your valve, our plain-English guide to faucet supply line dimensions will save you a second trip to the hardware store. Standard residential lines are usually 1/2″ but the valve inlets vary by model.
How is a wall mount faucet different from a regular deck faucet?
The core difference is that a wall mount faucet’s plumbing lives inside the wall, so nearly all the fitting and pressure-testing happens during rough-in construction — before tile, drywall, or paint. A deck-mounted faucet, by contrast, bolts onto the sink or countertop and connects to shut-off valves you can reach anytime under the sink.
That single difference changes everything about the sequence of work:
- You must decide the faucet’s exact height and horizontal spacing before the wall is closed.
- The valve body has to be anchored to blocking (a wood or metal brace between studs), not just floating in the cavity.
- The distance the valve sits back from the finished wall — the “rough-in depth” — must fall within a tight window so the trim reaches. Too deep and the handles won’t seat; too shallow and the escutcheons won’t sit flush.
- You can’t easily fix a leak later without opening the wall, so you pressure-test first.
If you’re still weighing whether a wall mount setup is even right for your space, it’s worth reading whether a wall mount faucet mixer is the right choice for your bathroom or kitchen sink before you commit — retrofitting one into an existing finished wall is a much bigger job than starting fresh.
What is the correct rough-in height and spacing for a Kohler wall mount faucet?
For a bathroom wall mount faucet, the spout is typically set so it clears the rim of your sink or vessel by a comfortable margin — commonly the spout centerline lands around 6″–12″ above the sink rim depending on vessel height — and widespread-style handles sit on standard 8″ centers. Always defer to the exact dimensions on your specific Kohler valve’s rough-in template, because it varies by model.
The safest approach is to physically set your sink (or a stand-in the same height) in place first, then measure up from the actual rim. A spout that looks perfect on paper can end up splashing or sitting too low over a tall vessel bowl. Here’s a quick reference for typical scenarios:
| Setup | Typical spout height above sink rim | Handle spacing (centers) | Watch out for |
|---|---|---|---|
| Vessel sink on vanity | 4″–8″ above the bowl rim | 8″ | Tall bowls need higher spout + longer reach |
| Undermount / drop-in sink | 6″–10″ above rim | 8″ | Ensure spout reach clears the basin center |
| Freestanding tub filler style | Per tub model | Varies | Different valve — don’t mix with lavatory trim |
| Kitchen / bar wall mount | Higher clearance for pots | 8″ typical | Longer spout reach over the basin |
The rough-in depth — how far the valve body sits behind the finished wall face — is the number people miss most. Kohler valves ship with a plaster ground or depth guide; set it flush to where your finished tile or drywall will land, not where the bare studs are. Account for backer board plus tile thickness (often 1/2″–3/4″ combined). If you set the valve to bare stud depth, your trim will stand proud of the wall and never seal.
How do you actually install it, step by step?
The install breaks into rough-in (before the wall closes) and trim-out (after tile and paint). Do the rough-in carefully and the trim-out is genuinely a 1–2 hour job with hand tools. Here’s the full sequence.
- Shut off the water. Close the main or the relevant branch valve and open a lower faucet to drain pressure.
- Install blocking. Fasten solid horizontal blocking between the studs where the valve body will mount. This is non-negotiable — the valve must not flex when you turn the handles.
- Position and anchor the valve body. Mount it to the blocking at your measured height and 8″ centers, using a level. Set the rough-in depth using the plaster ground so it accounts for your finished wall thickness.
- Connect the supply lines. Run hot and cold to the correct inlets (hot on the left as you face it, cold on the right, by convention). Use soldered copper, PEX, or push-fit connectors. Apply PTFE tape or sealant on threaded joints.
- Pressure-test before closing the wall. Turn the water back on and check every joint for weeps and drips. Cap the outlets or install temporary test caps. Leave it pressurized for a while and re-inspect. This is the step that saves you from tearing open finished tile later.
- Close and finish the wall. Install backer board, waterproofing, tile or drywall, and paint. Keep the valve stem openings clean and unobstructed.
- Install the escutcheons and handles. Slide the trim plates over the stems, seat them against the finished wall, and secure the handles with their set screws using the supplied hex key.
- Install the spout. Thread or slide the spout onto its outlet, tightening per the instructions. Don’t over-torque decorative finishes.
- Caulk the perimeter. Run a thin bead of silicone around the escutcheons and spout base where they meet the wall to block water intrusion. Leave a small gap at the bottom so any hidden moisture can escape.
- Turn on and test. Restore water, run hot and cold, check the temperature mix, and inspect for leaks at the trim.
If you’re new to faucet work generally, the mechanics of the trim-out are similar to a deck install — our walkthrough on how to install a bathroom vanity faucet yourself in under 2 hours covers the handle-and-supply basics that carry straight over.
What are the most common mistakes people make?
The biggest wall mount faucet mistakes are all rough-in errors that only surface after the wall is closed — wrong depth, no blocking, and skipping the pressure test. Because they’re expensive to fix later, they’re worth calling out plainly.
- Wrong rough-in depth. Setting the valve to stud depth instead of finished-wall depth is the number one failure. Measure your total wall buildup and set the plaster ground accordingly.
- No solid blocking. A valve floating on flimsy supports will loosen every time someone cranks a stiff handle, eventually cracking the seal or the tile.
- Reversed hot and cold. Easy to do inside a wall. Confirm orientation before soldering — hot left, cold right facing the wall.
- Skipping the pressure test. A pinhole leak behind finished tile is a nightmare. Always test before closing up.
- Over-tightening trim. Decorative finishes and thin escutcheons crush or scratch easily. Snug, not gorilla-tight.
- Buying trim and valve that don’t match. Kohler trim kits are model-specific. Confirm the valve family matches the trim before you start.
Kohler wall mount faucet vs. other brands: is Kohler the right pick?
Kohler is a strong, widely-available choice with excellent parts support and a solid warranty, which matters more than looks when a valve is buried in your wall. The right brand for you comes down to parts availability, finish options, and warranty terms rather than raw performance — the major names are all capable.
| Factor | Kohler | What to look for |
|---|---|---|
| Parts availability | Excellent, long-standing catalog | Can you still get cartridges in 10 years? |
| Warranty | Limited lifetime on many faucets | Read what’s covered vs. finish-only |
| Finish range | Wide (chrome, nickel, black, brass tones) | Match to other fixtures in the room |
| Rough-in documentation | Clear, model-specific templates | Detailed dimensions before you build |
If you’re specifically cross-shopping, we’ve compared the two giants head to head in Moen vs Kohler bathroom faucets and in Delta vs Kohler sink faucet — both are worth a read if you haven’t locked in your brand yet. For a wall mount install where the valve is permanent, prioritize the brand with the best long-term parts support in your region.
Do you need a plumber, or can you really DIY this?
You can DIY a Kohler wall mount faucet if you’re comfortable with basic plumbing connections and the wall is open (new construction or a remodel) — the trim-out especially is beginner-friendly. But if you’d have to open a finished wall, or if you’re soldering copper for the first time on a hidden joint, hiring a pro for the rough-in is money well spent.
The honest dividing line is this: the trim-out (handles, spout, caulk) is well within reach of a confident homeowner. The rough-in — anchoring the valve, running and testing supply lines, getting the depth right — is where mistakes are costly and hidden. If you’re doing a full remodel and the studs are exposed, tackling the whole thing yourself is very doable. If your wall is already finished, budget for at least partial professional help. For a sense of going rates, our breakdown of how much a plumber charges to install a bathroom faucet in 2026 will help you decide where DIY stops paying off.
FAQ
How high should a wall mount faucet be above the sink?
Set the spout so it clears your sink or vessel rim comfortably — commonly 4″–8″ above a vessel bowl and 6″–10″ above a standard basin rim — but always measure from your actual installed sink and follow your specific Kohler rough-in template. Taller vessel bowls need a higher spout with enough reach to pour into the center of the basin without splashing.
Can I install a Kohler wall mount faucet on an existing finished wall?
Yes, but it’s a significant job because you have to open the wall to install blocking, mount the valve at the correct depth, run supply lines, and pressure-test before patching and re-tiling. It’s far easier during new construction or a remodel when the studs are already exposed. On a finished wall, most people bring in a pro for the rough-in and handle the trim-out themselves.
What’s the standard handle spacing for a wall mount lavatory faucet?
Most widespread-style wall mount lavatory faucets use 8″ centers between the handles, matching common bathroom faucet spacing. Kitchen and bar wall mounts often use the same spacing. Confirm the exact figure on your specific model’s rough-in sheet, since single-handle and specialty valves differ.
How do I know the rough-in depth is correct?
Set the valve so its depth guide (plaster ground) sits flush with where your finished wall surface will be — not the bare studs — accounting for backer board plus tile or drywall thickness, often 1/2″–3/4″ combined. If the trim ends up standing proud of the wall or the handles won’t seat, the depth was set too shallow; if the escutcheons won’t reach the stems, it was too deep.
Do I really need to pressure-test before closing the wall?
Absolutely — it’s the single most important step. Once tile and drywall go up, a pinhole leak means tearing the wall back open. Restore water pressure, cap the outlets, and inspect every joint for weeps and drips over a sustained period before you close anything up. Five minutes of testing prevents days of demolition later.
Why won’t my new wall mount faucet handles line up flush with the wall?
Almost always a rough-in depth problem: the valve body was set too deep in the wall, so the trim can’t reach far enough to seat against the finished surface. Some Kohler trim kits include extension components for slightly deep installs, but there’s a limit. Check the valve depth against the trim’s allowable range in the instructions before assuming a part is defective.
A note on sourcing and standards
One last practical point: buy your valve and trim from an authorized source so your warranty is valid and your parts are genuine. Kohler faucets are built to recognized North American plumbing standards (look for ASME/ANSI and lead-free compliance markings), and many carry a limited lifetime warranty on the faucet and finish — but that coverage typically depends on correct installation and proof of purchase. Cheap gray-market valves and knockoff cartridges are a false economy when the part is sealed inside your wall; if you’ve ever been burned by bargain fixtures, our dealers explain exactly why you should never buy cheap bathroom fixtures.
Author note: This guide was written by the wigafaucet fixtures team, drawing on hands-on faucet installation and years of helping homeowners and contractors spec, install, and troubleshoot wall mount and deck faucets. We test fixtures and follow manufacturer rough-in documentation closely. As always, verify every dimension against your specific Kohler model’s instruction sheet, and when in doubt about in-wall plumbing, consult a licensed plumber — codes vary by locality.