 Wiga Tap Manufacturer
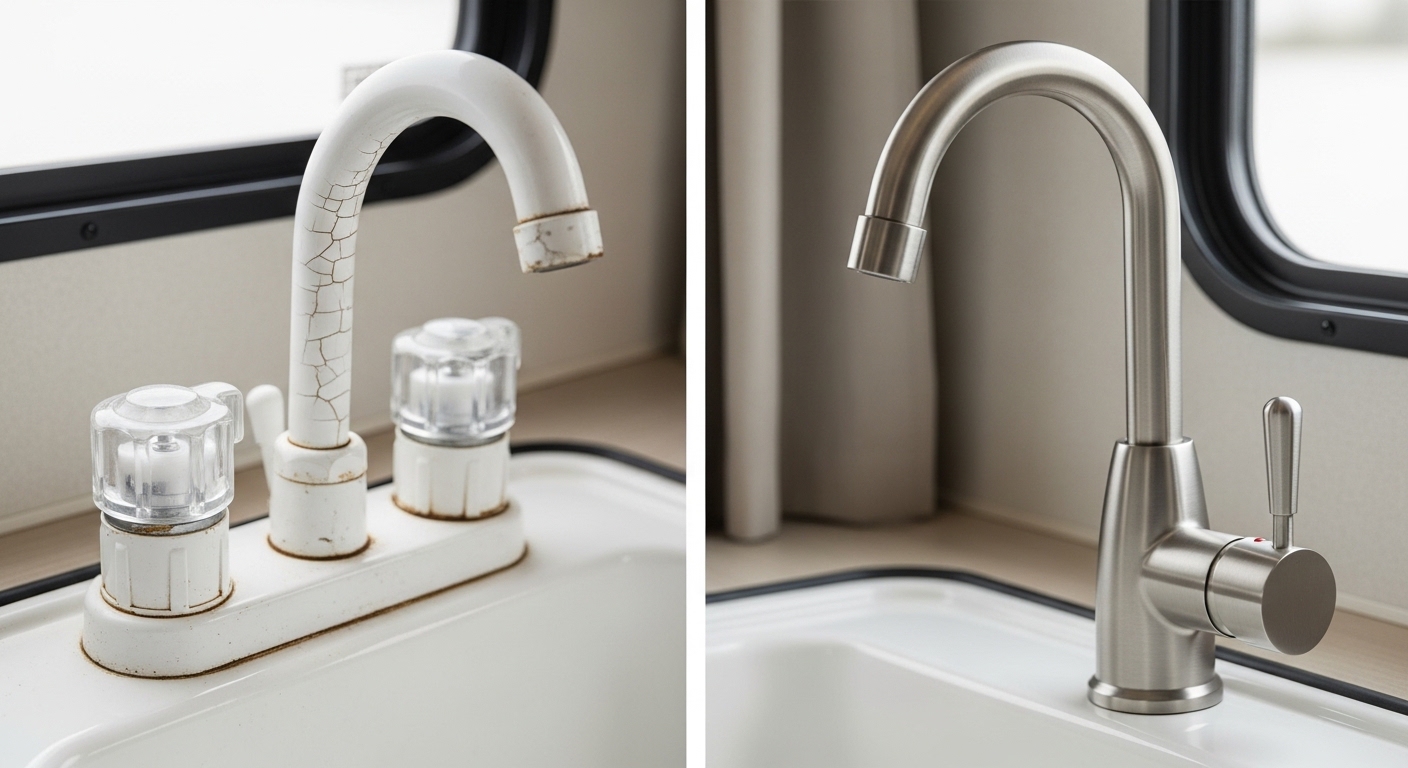
Learning how to install a kitchen faucet in an RV is one of the easiest, highest-value upgrades you can do to a camper, travel trailer, or motorhome — the original faucets that ship with most rigs are flimsy plastic units that crack, drip, and feel terrible to use. The good news: an RV faucet swap is genuinely simpler than a home install because the spaces are smaller, the plumbing is usually flexible PEX, and you’re rarely fighting decades of corrosion. Below I’ll walk you through exactly what fits, what tools you need, and how to do it without springing a leak on your first trip out.
This guide assumes a standard RV galley sink with one or two mounting holes and a 12-volt water pump feeding a fresh-water tank, which covers the vast majority of trailers and motorhomes on the road. If you’re working on a home kitchen instead, the broader mechanics still apply, but the fittings and clearances differ.
Can You Put Any Kitchen Faucet in an RV, or Does It Have to Be “RV-Specific”?
You don’t strictly need an “RV faucet,” but you do need one that fits the hole spacing and connects to your RV’s water lines. The biggest mistake people make is buying a heavy, tall residential faucet that either won’t bolt down to the existing holes or sticks up so high it bangs the cabinet when the slide-out closes. Match the hole configuration first, height and weight second.
RV galley sinks almost always use one of two layouts: a single-hole (one center hole for a single-handle faucet) or a 4-inch centerset / three-hole pattern. Measure the distance between the outer holes center-to-center before you buy anything. A residential faucet rated for the same hole pattern will physically fit, but watch three things specific to RVs:
- Weight: Heavy cast-brass residential faucets can stress a thin acrylic or thin-gauge stainless RV sink. Lighter zinc or quality brass mid-weight units are ideal.
- Height & reach: A high-arc gooseneck looks great but may not clear an overhead cabinet, a slide-out path, or the window above many dinette-side sinks. Measure your vertical clearance with the faucet “parked.”
- Connection type: RV plumbing is usually ½-inch PEX with threaded or push-fit adapters. A faucet with flexible braided supply lines and standard ⅜-inch or ½-inch female connectors adapts most easily.
So: any faucet that matches your holes, isn’t absurdly heavy, clears your cabinetry, and can connect to ½-inch lines will work. You don’t have to pay an “RV tax” for a plastic faucet — a solid residential single-handle unit often outlasts the factory part by years. If you want to understand how the underlying supply connections size up before you shop, our plain-English guide to faucet supply line dimensions walks through the exact thread and tubing sizes you’ll be matching.
What Tools and Parts Do You Actually Need for an RV Faucet Swap?
You need a basin wrench, an adjustable wrench, plumber’s tape, and a bucket or towel — that’s the core kit, and most of it costs under $30 total. Because RV under-sink cabinets are cramped, the basin wrench is the one tool that turns a frustrating job into a 30-minute one; it lets you reach the mounting nuts and supply connections tucked up behind the sink basin where your hand won’t fit.
| Item | Why You Need It | Approx. Cost |
|---|---|---|
| Basin wrench | Reaches deep mounting & supply nuts in tight RV cabinets | $12–$20 |
| Adjustable wrench / channel-locks | Loosen and tighten supply-line fittings | $10–$25 |
| PTFE plumber’s tape | Seals threaded connections against leaks | $2–$4 |
| New faucet (single-hole or 4″ centerset) | The replacement itself | $30–$120 |
| ½” PEX or ⅜” supply adapters (if needed) | Bridge faucet lines to RV plumbing | $5–$15 |
| Bucket / towels | Catch residual water in the lines | — |
One often-overlooked part: check whether your new faucet’s supply lines have the right end fittings. Many residential faucets come with ⅜-inch compression ends, while RV lines terminate in ½-inch PEX. A cheap pair of ½-inch-PEX-to-⅜-inch-female adapters (often push-fit, like SharkBite-style) bridges the gap in seconds and saves a second trip to the store.
How Do You Remove the Old RV Faucet Without Flooding the Cabinet?
Turn off both water sources first: switch off the 12V water pump at the panel AND disconnect city water if you’re hooked up to a campground spigot. Then open the faucet to relieve pressure and let the lines drain into a bucket. Skipping this step is exactly how people end up with a soaked under-sink cabinet and a wet floor.
Here’s the step-by-step removal:
- Kill the water. Turn off the 12V pump, unplug or close city-water inlet, and if your rig has them, close the local shut-off valves under the sink.
- Relieve pressure. Open the faucet (both hot and cold) and let it run dry. Open a nearby low faucet too if you want the lines to drain faster.
- Disconnect the supply lines. Place a bucket or towel underneath. Use your adjustable wrench to loosen the hot and cold supply connections at the faucet shanks. Expect a small cup of trapped water.
- Loosen the mounting nuts. Reach up with the basin wrench and back off the nuts holding the faucet to the sink deck.
- Lift the old faucet out. Once nuts and lines are free, the faucet pulls straight up. Scrape off any old plumber’s putty or gasket residue and wipe the sink deck clean.
If your RV doesn’t have local shut-off valves under the sink, this is a great time to add a pair — it means future faucet, sprayer, or filter work won’t require draining your whole fresh-water system. While you’re under there, eyeball the sprayer hose and diverter if your faucet has a side spray; a worn one is cheap to replace now while everything’s apart. Our guide on the sink sprayer diverter valve explains how that part works and when to swap it.
How Do You Connect and Seal the New Faucet So It Doesn’t Leak?
Mount the new faucet to the deck first, then connect the supply lines hand-tight plus about a quarter to half turn with a wrench — no more. Over-tightening flexible braided lines and plastic faucet shanks is the number-one cause of leaks and cracked fittings in RVs, not under-tightening. Snug, not gorilla-tight.
The sequence:
- Set the gasket or putty. Most modern faucets include a rubber or foam base gasket — use it. If yours calls for plumber’s putty, roll a thin rope and seat it under the base.
- Drop the faucet in and align it. Feed the supply lines and any deck plate through the hole(s), and orient the spout straight.
- Tighten the mounting nuts. From below, hand-thread the mounting nuts, then snug with the basin wrench while holding the faucet straight from above.
- Wrap threads with PTFE tape. On any threaded (not compression) connection, wrap PTFE tape clockwise 2–3 times.
- Connect hot and cold. Attach the faucet’s flexible lines to your RV supply lines or adapters. Cold is typically right, hot is left — match them so the handle behaves correctly.
- Snug the fittings. Hand-tight, then a quarter-to-half turn with a wrench. Stop there.
One RV-specific tip: support the supply line so it doesn’t kink or rub against a cabinet wall as the rig moves down the road. Road vibration is brutal on connections that home plumbing never experiences — a zip-tie anchoring the line gently to the cabinet prevents a slow chafe leak months later.
How Do You Test for Leaks and Restore Water Pressure After Installing?
Turn the water pump back on, leave the faucet open at first so air purges out, then close it and watch every connection for 60 seconds — and again after a few hours of driving. RV water systems trap a lot of air, so expect sputtering and spitting for 15–30 seconds before the flow turns smooth. That’s normal, not a problem with your install.
Run through this check:
- Purge air: Open both hot and cold fully. Let the pump cycle and push air through until water runs steady.
- Pressurize and hold: Close the faucet. The pump should build pressure and then shut off — and stay off. If the pump keeps short-cycling (clicking on and off every few seconds) with the faucet closed, you have a leak somewhere.
- Feel every joint: Run a dry paper towel around each supply connection and the faucet base. Any dampness shows up instantly on white paper.
- Recheck warm: After the system has been pressurized for a few hours, look again. Fittings settle.
If pressure feels weak after the install, the culprit is usually the faucet’s aerator or a built-in flow restrictor, not your pump. Many faucets ship with restrictors that choke the already-modest flow of a 12V RV pump. If you’d rather not live with a trickle, our walkthrough on how to remove the kitchen faucet flow restrictor shows how to free up pressure safely, and the faucet aerator key removal guide covers popping out a stuck or recessed aerator without scratching the finish.
Single-Handle vs. Two-Handle RV Faucets: Which Is Better for a Camper?
For most RVers, a single-handle faucet is the better pick — fewer connections to leak, easier one-hand operation when you’re cooking in a tight galley, and simpler to install. Two-handle faucets give you a more “residential” look and independent hot/cold control, but they add a connection point and take more counter real estate you usually don’t have in an RV.
| Feature | Single-Handle | Two-Handle (4″ Centerset) |
|---|---|---|
| Connections to seal | Fewer (simpler install) | More (slightly higher leak risk) |
| One-hand use | Excellent | Awkward |
| Counter space needed | Minimal (single hole) | More (three holes) |
| Look | Modern, compact | Classic, residential |
| Best for | Most travel trailers & vans | Larger fifth-wheels with roomy galleys |
If you already have a three-hole sink and don’t want to buy a deck plate, a 4-inch centerset (single-handle or two-handle) drops right in. If you have a single-hole sink, stick with a single-hole faucet. The finish matters less for function, but on the road, a brushed/satin finish hides water spots and fingerprints far better than polished chrome — handy when you’re not cleaning as often as you would at home.
Do You Need to Worry About Water Pressure or Pump Compatibility?
Almost never — virtually any standard kitchen faucet works with an RV’s 12V pump because RV pumps deliver lower pressure (typically 45–55 PSI) than a residential supply, and faucets are built to handle far more. The thing to watch isn’t whether the faucet can handle your pressure; it’s whether the faucet restricts the already-limited flow your pump provides. Choose a faucet with a standard aerator you can swap or open up rather than a heavily restricted “eco” model.
If you frequently hook up to city water at campgrounds, make sure you’re using an inline pressure regulator at the spigot. Campground water pressure can spike well above 80 PSI, which can blow out faucet cartridges and supply-line fittings over time — in an RV or a house. A $12 brass regulator protects your new faucet and the rest of your plumbing. This is the same logic behind buying quality fixtures in the first place; cheap faucets fail fastest exactly where pressure spikes, a point dealers make bluntly in our piece on why you should never buy cheap bathroom fixtures.
FAQ
How long does it take to install a kitchen faucet in an RV?
For most people, 30–60 minutes. A straightforward single-hole swap with accessible connections can be done in half an hour; add time if you’re installing shut-off valves, fighting corroded fittings, or working around a particularly cramped cabinet. First-timers should budget an hour and not rush the leak check.
Can I use a regular home kitchen faucet in my RV?
Yes, as long as it matches your sink’s hole pattern, isn’t too heavy for a thin RV sink, clears your cabinetry, and can connect to ½-inch PEX lines (often via a cheap adapter). A quality residential faucet usually outperforms and outlasts the factory plastic unit — just avoid oversized high-arc designs that won’t clear overhead cabinets or slide-outs.
What size are RV faucet water lines?
Most RVs use ½-inch PEX tubing for fresh-water supply, terminating in threaded or push-fit fittings. Faucet supply lines are commonly ⅜-inch or ½-inch. If the ends don’t match, a ½-inch-PEX-to-⅜-inch-female adapter bridges them. Measure and confirm before buying so you’re not stuck mid-install.
Why does my RV faucet sputter and spit after installation?
That’s trapped air purging out of the lines and water heater — completely normal. Open both hot and cold fully, let the pump run for 15–30 seconds until the flow turns steady, then close the faucet. If sputtering continues for minutes or the pump won’t stop cycling, you likely have a loose connection drawing air, so recheck your fittings.
Do I need plumber’s putty or just the gasket for an RV faucet?
Use whatever the faucet manufacturer specifies. Most modern faucets include a rubber or foam base gasket that seals fine on its own — no putty needed. Only use plumber’s putty if the instructions call for it or if your faucet base is uneven; over-using putty can actually prevent a good gasket seal.
Will a heavier faucet damage my RV sink?
It can, if the sink is thin acrylic or light-gauge stainless and the faucet is solid cast brass. The weight stresses the mounting deck over thousands of road miles of vibration. Choose a mid-weight quality faucet, and if you love a heavier model, reinforce the mounting area with a backing washer or plate to spread the load.
A Note on Expertise, Testing & Warranty
About the author: This guide was written by the wigafaucet product team, drawing on hands-on installation of kitchen and bathroom faucets across RVs, tiny homes, and residential kitchens. We’ve done these swaps in cramped travel-trailer galleys and full-size fifth-wheels, so the tool list and torque advice above come from real installs, not a spec sheet.
Brand credibility: wigafaucet manufactures and sells faucets and bathroom fixtures built to international plumbing standards, with cartridges pressure-tested for hundreds of thousands of open/close cycles. Our kitchen faucets are backed by a manufacturer’s warranty on the finish and cartridge, and we test fittings to handle pressures well above what a 12V RV pump — or a regulated city-water hookup — will ever deliver. Always pair any new faucet with an inline pressure regulator on city water to keep that warranty meaningful and your fittings leak-free for the long haul.