 Wiga Tap Manufacturer
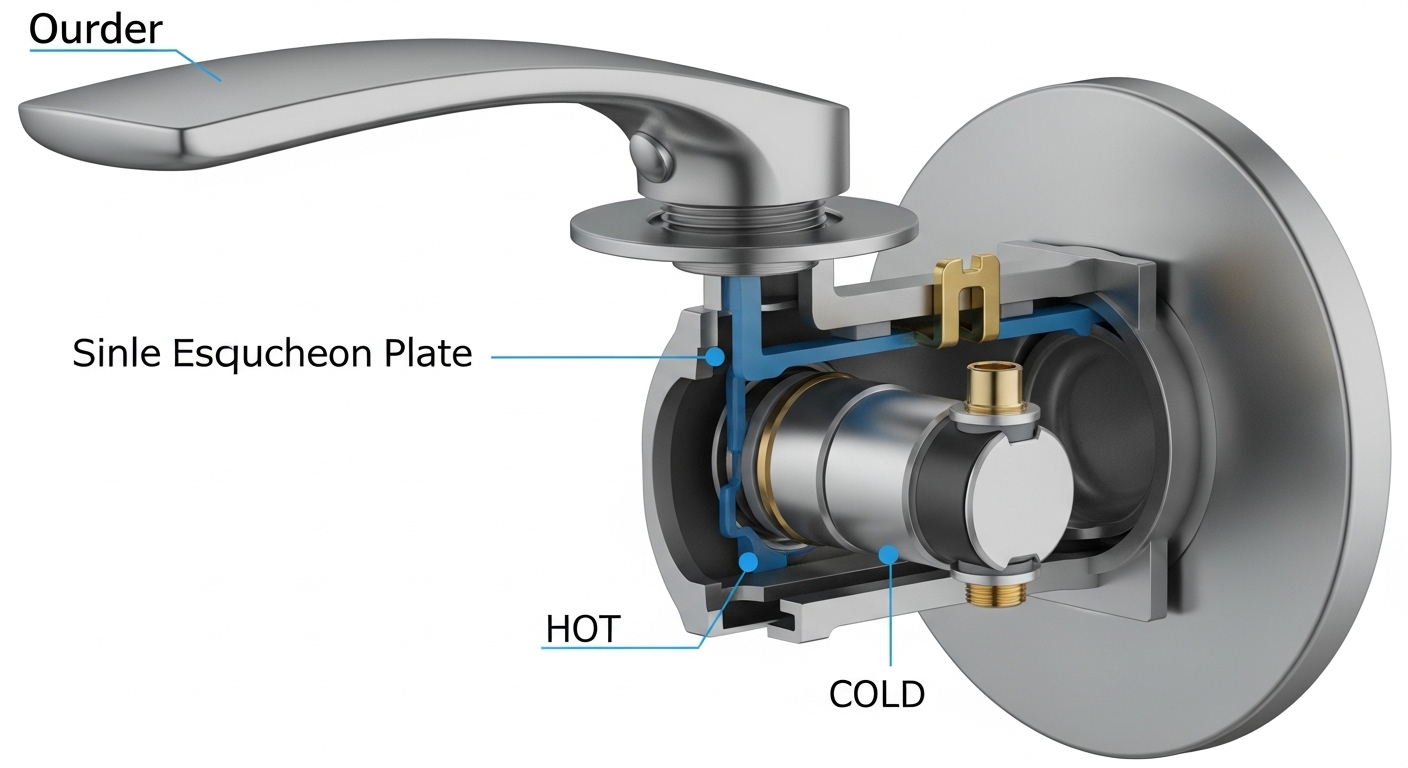
Learning how to remove an old shower faucet cartridge is the single most useful plumbing skill for anyone dealing with a dripping shower, a handle that won’t shut off fully, or water that suddenly runs scalding hot then icy cold. The cartridge is the heart of a modern single-handle shower valve — a cylindrical insert that mixes hot and cold and controls flow. When it wears out, you don’t replace the whole valve buried in the wall; you swap this one part. Below, we walk through exactly how to pull it out cleanly, including the frustrating case where it’s seized by years of hard-water scale.
How Do You Know the Cartridge Is the Problem and Not Something Else?
You know it’s the cartridge when your shower drips constantly after being shut off, the handle gets harder to turn, the temperature won’t hold steady, or you can’t reach full hot or full cold anymore. These are classic worn-cartridge symptoms. If instead the water pressure is weak everywhere in the house, or the leak is coming from a pipe joint behind the wall, the cartridge isn’t your culprit.
The cartridge contains rubber seals, O-rings, and often a set of internal ports that wear down or clog with mineral deposits over 5–10 years. Once those seals fail, no amount of tightening the handle will stop the drip — the water sneaks past worn rubber. A dripping shower head wastes roughly 500 gallons a month at a single drip per second, so this is worth fixing promptly. If your issue is actually at the handle base rather than inside the wall, our guide on a leaking faucet handle covers the overlapping diagnosis steps for sink fixtures, which use the same seal-and-cartridge logic.
What Tools Do You Need to Remove a Shower Faucet Cartridge?
You need a few basic hand tools plus one brand-specific part — most jobs take under 45 minutes. Here’s the short list before you shut the water off:
- Allen/hex key set — for the tiny set screw under the handle.
- Phillips and flathead screwdrivers — for handle screws and prying trim.
- Needle-nose pliers — to grab the retaining clip.
- Channel-lock pliers or an adjustable wrench — for bonnet nuts.
- A cartridge puller tool — brand-specific (Moen, Delta, and Kohler each sell their own), a lifesaver for stuck cartridges.
- White vinegar and a rag — to dissolve mineral scale.
- Plumber’s grease — for the new cartridge’s O-rings on reinstall.
- A towel and a small bucket — to catch residual water and protect the drain.
Put a rag or drain cover over the shower drain first. The number-one avoidable disaster in this job is dropping the tiny retaining clip or set screw straight down an open drain. Ask any plumber — it happens constantly.
How to Remove Old Shower Faucet Cartridge, Step by Step
The process is: kill the water, strip the trim, release the cartridge’s anchor, then pull it straight out. Here’s the full sequence that works for most single-handle valves.
- Shut off the water. Use the shower’s integral stops if it has them (small screws behind the trim plate), otherwise close the main house valve. Then open the shower handle to release residual pressure and drain the line.
- Remove the handle. Pop off the decorative cap or button to expose the set screw. Loosen it with your hex key and pull the handle straight off the stem. If it’s stuck from corrosion, wiggle gently — don’t wrench it.
- Remove the trim/escutcheon. Unscrew or unclip the round trim plate and any sleeve or temperature-limit stop behind it. Set the small parts aside in a cup so nothing rolls into the drain.
- Release the cartridge anchor. Most cartridges are held by either a small U-shaped brass or plastic retaining clip (pull it straight up with needle-nose pliers) or a threaded bonnet/retainer nut (unscrew counterclockwise with pliers). Some have a plastic retainer nut you turn by hand.
- Note the orientation. Before pulling, look for the hot/cold alignment notch or the “up” mark on the cartridge stem. Snap a phone photo. Installing the new one 180° off will reverse your hot and cold water.
- Pull the cartridge out. Grip the stem with pliers and pull straight toward you while gently rocking side to side to break the seal. If it resists, this is where a cartridge puller earns its keep — it threads onto the stem and gives you leverage to pull it dead straight.
Pull straight out, not at an angle. Cocking the cartridge sideways is how people crack the plastic valve body inside the wall — the most expensive mistake in this job, because that means opening the wall. If you’re generally new to fixture work, the same careful, no-force approach in our bathroom vanity faucet install guide applies here: patience beats muscle every time.
What If the Cartridge Is Stuck or Corroded Solid?
If the cartridge won’t budge, it’s almost always mineral scale or corrosion welding the brass sleeve to the valve body — the fix is penetrating heat, vinegar, and a proper puller, not brute force. This is the single most common wall people hit, especially in hard-water regions.
Work through these escalating steps in order:
- Soak it. Wrap the exposed cartridge in a vinegar-soaked rag for 20–30 minutes to dissolve calcium buildup. Repeat if needed.
- Use the brand’s puller tool. A Moen 1200/1225 puller or Delta/Kohler equivalent grips the cartridge and pulls it perfectly straight with a wrench for leverage. This alone solves the vast majority of “stuck” cartridges.
- Rock and twist. With the retaining clip fully removed, twist the cartridge a quarter turn each way to shear the scale bond, then pull.
- Double-check the clip is really out. Ninety percent of “it won’t come out” cases are a retaining clip that’s still half-seated. It must be completely removed first.
If you’ve soaked it, confirmed the clip is out, and used a puller and it still won’t move, stop before you crack the valve body. At that point the smart call is a plumber, and it helps to know the going rate — our breakdown of what a plumber charges for bathroom faucet work gives you realistic 2026 numbers so you’re not caught off guard.
How Do Cartridge Types Differ Across Moen, Delta, Kohler, and Pfister?
They differ in shape, retaining method, and removal tool — a Moen cartridge does not fit a Delta valve, and using the wrong replacement is the top reason DIY shower repairs fail. Identify your brand before buying anything. The brand is usually stamped on the trim plate, the handle, or the old cartridge itself.
| Brand | Common Cartridge | Held In By | Removal Notes |
|---|---|---|---|
| Moen | 1225 / 1222 / Posi-Temp | Brass U-clip | Notoriously seizes; use the Moen puller tool. Twist to free. |
| Delta | RP19804 / RP46074 (Monitor) | Bonnet nut + clip | Unscrew bonnet nut, lift out; often easier than Moen. |
| Kohler | GP-500520 (Rite-Temp) | Retainer nut | Plastic retainer; hand-loosen, pull straight. |
| Pfister | 974-042 / 0X8 | Retaining clip | Clip pulls up; cartridge slides out. |
| American Standard | Ceramic disc unit | Bonnet nut | Wrench off the nut; disc units are heavier. |
The takeaway: match the exact model number, not just the brand. Delta owners in particular should know their system inside-out — our guide to Delta faucet cartridge replacement parts breaks down which RP number matches which valve, so you don’t order the wrong insert and have to redo the trip. A five-dollar mismatch means a shower that’s out of service for another few days while the right part ships.
Do You Need to Turn Off the Main Water Supply?
Yes — you must stop water to the shower before removing the cartridge, but you don’t always have to kill the whole house. Many newer shower valves have integral stops (small slotted screws inside the valve behind the trim) that let you isolate just that shower. Turn them clockwise to close.
If your valve has no integral stops — common in older homes — you’ll shut the main supply valve where water enters the house, or a branch valve if you have one. After closing it, always open the shower handle to bleed off the pressure and let the pipe drain. Skipping that step means a face-full of water the moment you pull the cartridge. Keep a towel handy; a cup or two of trapped water always comes out with the cartridge.
How Much Does This Save vs. Calling a Plumber?
Doing it yourself typically costs $15–$60 for the cartridge plus maybe $20 for a puller tool, versus $150–$350 for a plumber’s service call and labor. That’s the direct payoff of learning how to remove an old shower faucet cartridge yourself — a repair that’s genuinely within reach for most homeowners with basic tools and an hour of patience.
The math strongly favors DIY if the cartridge comes out cleanly, which it does the majority of the time. Where the calculus flips is a seized cartridge in a fragile older valve body, or a valve so old the replacement cartridge is discontinued. In those cases, paying a pro to avoid opening the wall is money well spent. And it’s a strong argument for buying quality fixtures up front — cheap valves seize and fail far sooner, a point plumbers make bluntly in this frank take on why cheap bathroom fixtures cost more in the long run.
What Should You Do Before Installing the New Cartridge?
Before the new cartridge goes in, flush the valve, clean the seat, and grease the O-rings — a five-minute prep that prevents leaks and makes the next removal far easier. Skipping it is why some “new” cartridges start dripping within weeks.
- Flush the valve body. Briefly crack the water back on (handle removed) to blast out grit and scale debris, then shut it again.
- Clean the bore. Wipe the inside of the valve body with a vinegar rag to remove mineral scale so the new cartridge seats fully.
- Grease the O-rings. Coat the new cartridge’s O-rings with plumber’s silicone grease (never petroleum grease — it degrades rubber). This seals better and makes future removal easy.
- Match the orientation. Insert with the hot/cold notch aligned exactly as the old one came out — check that phone photo you took.
- Reassemble and test. Reinstall the clip, trim, and handle, then slowly turn the water back on and check both temperature and full shut-off.
FAQ
Can I remove a shower cartridge without a special puller tool?
Often, yes. If the cartridge isn’t heavily corroded, needle-nose pliers gripping the stem with a straight, gently rocking pull will free it. But for Moen valves and any cartridge in hard-water areas, the brand’s puller tool is worth the $20 — it pulls dead-straight and saves you from cracking the valve body.
Are all shower faucet cartridges the same?
No. Cartridges are brand- and model-specific. A Moen 1225 won’t fit a Delta or Kohler valve, and even within one brand there are multiple models. Always identify the exact model from the trim, handle, or old cartridge before buying a replacement.
How long does a shower cartridge last?
Typically 5–10 years, though hard water shortens that considerably by accelerating mineral buildup on the seals. If you’re replacing cartridges every couple of years, a whole-house water softener or a higher-grade valve is the better long-term fix.
Why is my shower still dripping after I replaced the cartridge?
Usually one of three things: the new cartridge is the wrong model, debris got trapped under a seal during install, or the valve seats themselves are worn. Pull it, flush the valve body, clean the bore, re-grease the O-rings, and confirm you have the exact matching part number.
What if my old cartridge model is discontinued?
Many older cartridges have direct replacements or updated equivalents under a new part number — check the manufacturer’s cross-reference chart or contact their support with your valve series. If nothing matches, you may need a full valve replacement, which does involve opening the wall and is a job most people hand to a plumber.
Do I need to open the wall to replace a shower cartridge?
No — that’s the whole point of a cartridge. It’s designed to be removed and replaced from the front, through the handle opening, without touching the plumbing behind the wall. You only open the wall if the valve body itself is cracked or corroded beyond repair.
About the author: This guide was written by the wigafaucet fixtures team, drawing on hands-on installation and repair experience across Moen, Delta, Kohler, and Pfister shower valves. About wigafaucet: wigafaucet.com specializes in faucets, shower systems, and bathroom fixtures, and our product cartridges and valves are tested to ASME A112.18.1 / CSA B125.1 performance standards, with replacement cartridges backed by a manufacturer warranty. When in doubt about a seized valve, consult a licensed plumber — some repairs are safer left to a pro.