 Wiga Tap Manufacturer
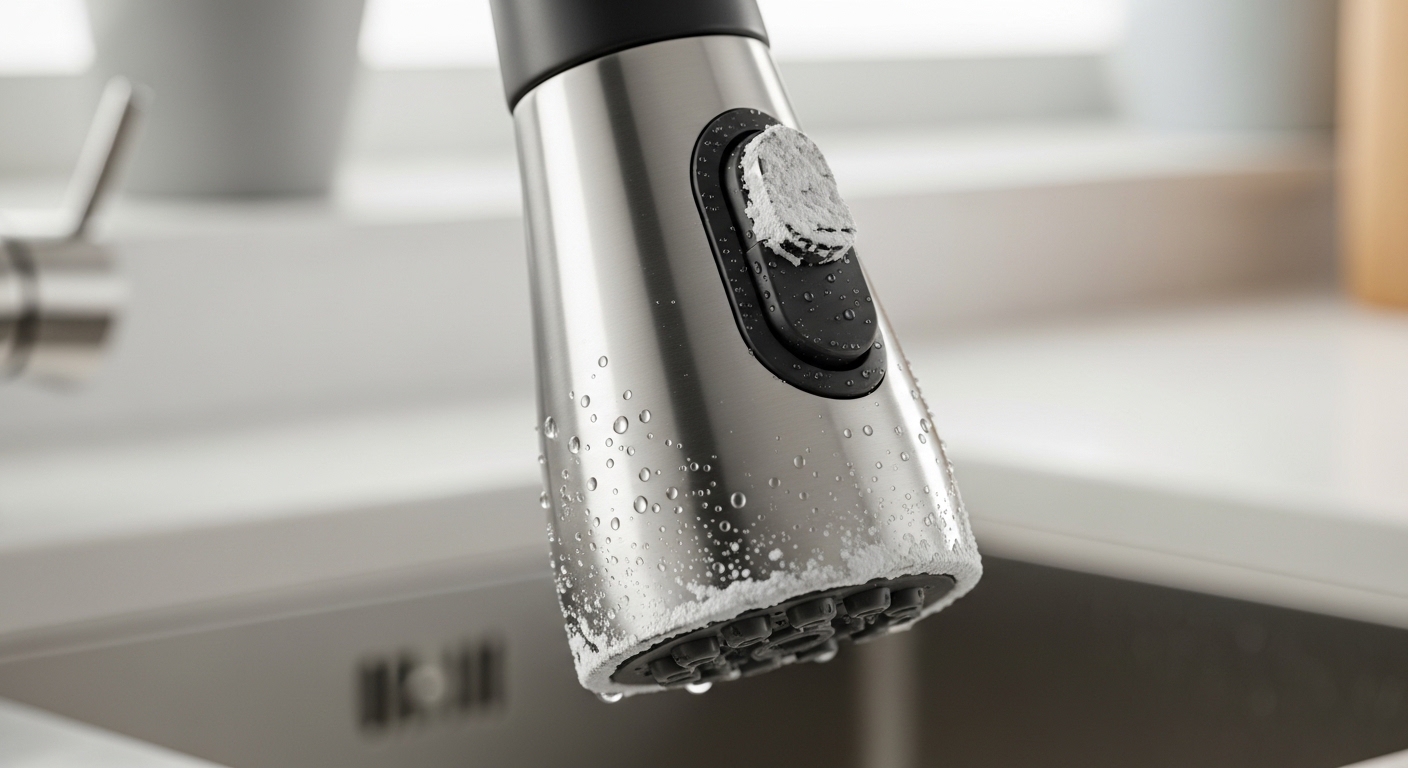
If your faucet sprayer sticking is driving you crazy — the button won’t push, the pull-down head won’t glide back into the dock, or the spray mode won’t switch back to a steady stream — you’re not alone, and it’s rarely a “buy a whole new faucet” problem. Nine times out of ten it’s a cheap, fixable issue: minerals, a tired diverter, or a spray head that was built too cheaply to begin with. This guide walks you through what’s actually causing it, how to fix each cause in plain English, and — because search intent here is “which one should I buy” — which sprayer designs are engineered not to stick so you never deal with this again.
At wigafaucet we build and test kitchen and bar faucets for exactly these failure points, so this isn’t generic advice scraped off a forum — it’s what we see on the bench when a returned sprayer lands on our test rig.
Why is my faucet sprayer sticking in the first place?
Your faucet sprayer is sticking because of one of three things: mineral scale from hard water clogging the moving parts, soap and grease gumming up the toggle button, or a worn-out diverter valve inside the faucet body. That’s the short answer — and the order matters, because the fix gets progressively more involved.
Here’s what’s physically happening in each case:
- Hard-water scale (most common): Calcium and magnesium in your water dry into a chalky crust on the spray face and around the mode button. Over months it turns a smooth-gliding button into a gritty, half-jammed one. If you live somewhere with water above ~7 grains per gallon of hardness, this is your culprit.
- Soap, grease, and grime: On a kitchen sprayer especially, cooking grease and dish soap migrate into the seam around the toggle and dry sticky. The button feels “glued.”
- A worn diverter valve: The diverter is the little valve (in a side-sprayer faucet it sits under the spout; in a pull-down it’s in the spray head or body) that redirects water to the sprayer. When it wears out or clogs, the sprayer won’t engage, water backs up out of the spout, or the spray mode “sticks” and won’t reset.
- Hose friction or a kinked docking magnet: On pull-down faucets, if the head won’t retract smoothly, the culprit is usually a weak weight/pulley on the hose or a hose that’s snagging inside the spout — not the sprayer button at all.
Figuring out which one you’ve got takes about 30 seconds, which is the next section.
How do I know if it’s mineral buildup or a broken diverter?
Push the spray button with the water off. If it’s stiff, gritty, or crusty, it’s mineral buildup or grime — a cleaning job. If the button moves freely but the sprayer still won’t switch modes or won’t pull water when the faucet is running, it’s the diverter valve — a replacement job.
Run this quick diagnostic:
- Water off, press the toggle. Sticky or crunchy = scale/grime. Smooth = move on.
- Water on, try to switch stream ↔ spray. If it physically switches but water dribbles weakly from both, the diverter is worn.
- Pull-down head only: does it retract? If the button works but the head hangs low or won’t seat in the dock, it’s the hose weight or docking magnet, not the sprayer.
- Side sprayer only: does the main spout keep running when you squeeze the sprayer? That’s a classic failing diverter — the same part we cover in our guide to the sink sprayer diverter valve, which is the single most common reason a side sprayer stops working properly.
How do I fix a sticking faucet sprayer myself (step by step)?
Start with a vinegar soak — it fixes the majority of sticking sprayers for the price of a bottle of white vinegar. Only move to parts replacement if cleaning doesn’t restore smooth operation.
Step 1: Soak the spray head in white vinegar
Unthread the spray head from the hose (most twist off by hand or with a quarter-turn). Submerge it in a bowl of undiluted white vinegar for 30–60 minutes — overnight for heavy crust. The vinegar dissolves the calcium scale that’s jamming the button and clogging the nozzles. Then scrub the spray face with an old toothbrush and rub the rubber nozzle tips with your thumb; the softened deposits pop right off.
Step 2: Clean around the mode button
Work a little vinegar into the seam around the toggle button with a cotton swab, press the button a few dozen times to work it loose, and wipe away the grime. A tiny dab of plumber’s silicone grease (never petroleum/Vaseline — it swells the rubber) on the button shaft keeps it gliding.
Step 3: Check the flow — and the restrictor
If the sprayer feels weak and sticky after cleaning, a clogged flow restrictor or aerator can be part of the problem. It’s a five-minute check; our walkthrough on removing the kitchen faucet flow restrictor shows exactly where it hides and how to rinse it out.
Step 4: Replace the diverter valve if switching still fails
If the button is clean and free but the sprayer still won’t divert water, pull the diverter. Shut off the supply lines, remove the spout or spray head per your model, and pop out the diverter cartridge. Take it to the store or match the part number online. On brand faucets these are inexpensive OEM parts — for Delta-style valves, our guide to Delta faucet cartridge replacement parts covers how to identify and swap the right one without guessing.
Step 5: Fix a lazy pull-down head
If the head won’t dock, locate the hose weight clamped to the supply hose under the sink and slide it lower to add pull, or clear whatever’s snagging the hose inside the cabinet. Check that the docking magnet or collar isn’t cracked. No vinegar needed — this is purely mechanical.
What tools and supplies do I actually need?
Almost nothing. Here’s the full kit for a stuck sprayer fix:
- White vinegar (1 bottle)
- An old toothbrush + cotton swabs
- Plumber’s silicone grease (a $5 tube lasts years)
- A replacement diverter or spray head only if cleaning fails
- An adjustable wrench and a towel (for the under-sink work)
Total cost if it’s just a cleaning: under $10. Total cost if you need a diverter: usually $8–$25. Compare that to a plumber’s minimum call-out, and DIY wins overwhelmingly for this specific repair.
Which sprayer types stick the least — and what should I buy?
If you’re buying a replacement to end the sticking problem for good, go for a pull-down or pull-out with a silicone/rubber “self-cleaning” spray face and a solid ceramic diverter — those two features resist the scale and wear that cause 90% of sticking. Avoid the cheapest side sprayers with plastic diverters; they’re the ones that stick fastest.
Here’s how the common sprayer styles compare on stick-resistance and cost:
| Sprayer type | How prone to sticking | Why | Typical price |
|---|---|---|---|
| Pull-down (integrated spray head) | Low | Fewer external moving parts; magnetic dock; silicone spray face | $90–$300 |
| Pull-out (compact spray head) | Low–Medium | Same head tech, but shorter hose can kink | $70–$220 |
| Side sprayer (separate, deck-mounted) | High | Relies on a separate diverter that clogs and wears | $25–$80 |
| Bar/prep sprayer | Low–Medium | Smaller, often high-arc pull-downs; quality varies by brand | $60–$180 |
If you’re outfitting a prep sink or a commercial bar area, the sprayer choice is a bit different — flow rate and reach matter more — and we break that down in our guide to choosing a bar faucet sprayer. And if you’re weighing overall build quality before you buy anything, our breakdown of what actually makes the best kitchen faucet quality in 2026 explains which internal parts — including the diverter and spray head — separate a faucet that sticks in a year from one that lasts a decade.
How do I stop my faucet sprayer from sticking again?
Prevent future sticking by wiping the spray head dry after heavy use, doing a vinegar soak every 2–3 months if you have hard water, and buying a faucet with a silicone spray face and ceramic diverter from the start. Prevention is basically free once you build the habit.
Three concrete habits that keep a sprayer smooth for years:
- Quarterly vinegar soak in hard-water areas — it takes 30 minutes and stops scale before it locks the button.
- Rub the rubber nozzles whenever you clean the sink; loose deposits wipe off before they harden.
- Don’t force a sticky button. Forcing it can crack the plastic toggle. Soak first, then it moves freely on its own.
Is a sticking sprayer ever a sign to replace the whole faucet?
Usually no — but replace the faucet if the sprayer body is cracked, the diverter part is discontinued, or the faucet is a decade-plus old with corroded internals. In those cases you’ll spend more chasing parts than a mid-range replacement costs. A sticking button by itself is never a reason to replace an otherwise good faucet.
One honest rule of thumb we tell customers: if the faucet was a bargain-bin model with plastic guts, it’ll keep failing no matter how many parts you swap — and that’s exactly the false economy dealers warn about in why you should never buy cheap bathroom fixtures. Spend once on solid internals and the sticking problem simply stops recurring.
FAQ
Why does my kitchen faucet sprayer button stick when I press it?
It’s almost always mineral scale or dried soap/grease around the toggle. Soak the spray head in white vinegar for 30–60 minutes, work the button while it soaks, and add a dab of silicone grease to the shaft. If the button moves freely but the sprayer still won’t switch modes, the diverter valve is worn and needs replacing.
Can I fix a sticking faucet sprayer without replacing any parts?
Yes, in most cases. A vinegar soak plus cleaning around the button restores smooth operation for the majority of sticking sprayers, because scale and grime are the top causes. You only need replacement parts (a diverter or a new spray head) if cleaning doesn’t fix the mode-switching or retraction.
What kind of vinegar or cleaner should I use on a stuck sprayer?
Plain undiluted white distilled vinegar is ideal — it’s mildly acidic, dissolves calcium scale, and won’t harm chrome, brushed nickel, or most PVD finishes during a short soak. Avoid harsh acids, bleach, or abrasive pads, which can scratch the finish and damage rubber nozzles. Rinse thoroughly afterward.
Why won’t my pull-down sprayer retract into the faucet?
That’s a mechanical issue, not a sticking button. The hose weight under the sink may have slipped, the hose may be snagging inside the cabinet, or the docking magnet may be weak or cracked. Slide the weight lower on the hose to add pull, clear any snags, and check the dock — no cleaning required.
How often should I clean my faucet sprayer to prevent sticking?
In hard-water areas, a quick vinegar soak every 2–3 months prevents scale from ever locking the button. In soft-water areas, once or twice a year is plenty. Wiping the spray head dry after heavy use and rubbing the rubber nozzles during regular sink cleaning stretches that interval even further.
Is a side sprayer or a pull-down less likely to stick?
A pull-down is less likely to stick. Side sprayers depend on a separate diverter valve that clogs and wears out — the number-one failure point — while pull-down heads use a self-cleaning silicone spray face and an integrated, better-sealed diverter. If sticking has been a recurring headache, upgrading to a quality pull-down usually ends it.
About the author: This guide was written by the product team at wigafaucet, where we design, pressure-test, and cycle-test kitchen and bar faucet sprayers on the bench — often running spray heads through tens of thousands of button-press and dock cycles to find where cheaper designs stick and fail.
Brand credibility & standards: wigafaucet manufactures and sells faucets and bathroom fixtures at wigafaucet.com. Our spray heads and diverters are built to standard low-lead (NSF/ANSI 61 / 372) material requirements and cycle-life testing, and our faucets carry a manufacturer warranty covering the sprayer mechanism — because the diverter and spray head are exactly the parts a good warranty should stand behind.