 Wiga Tap Manufacturer
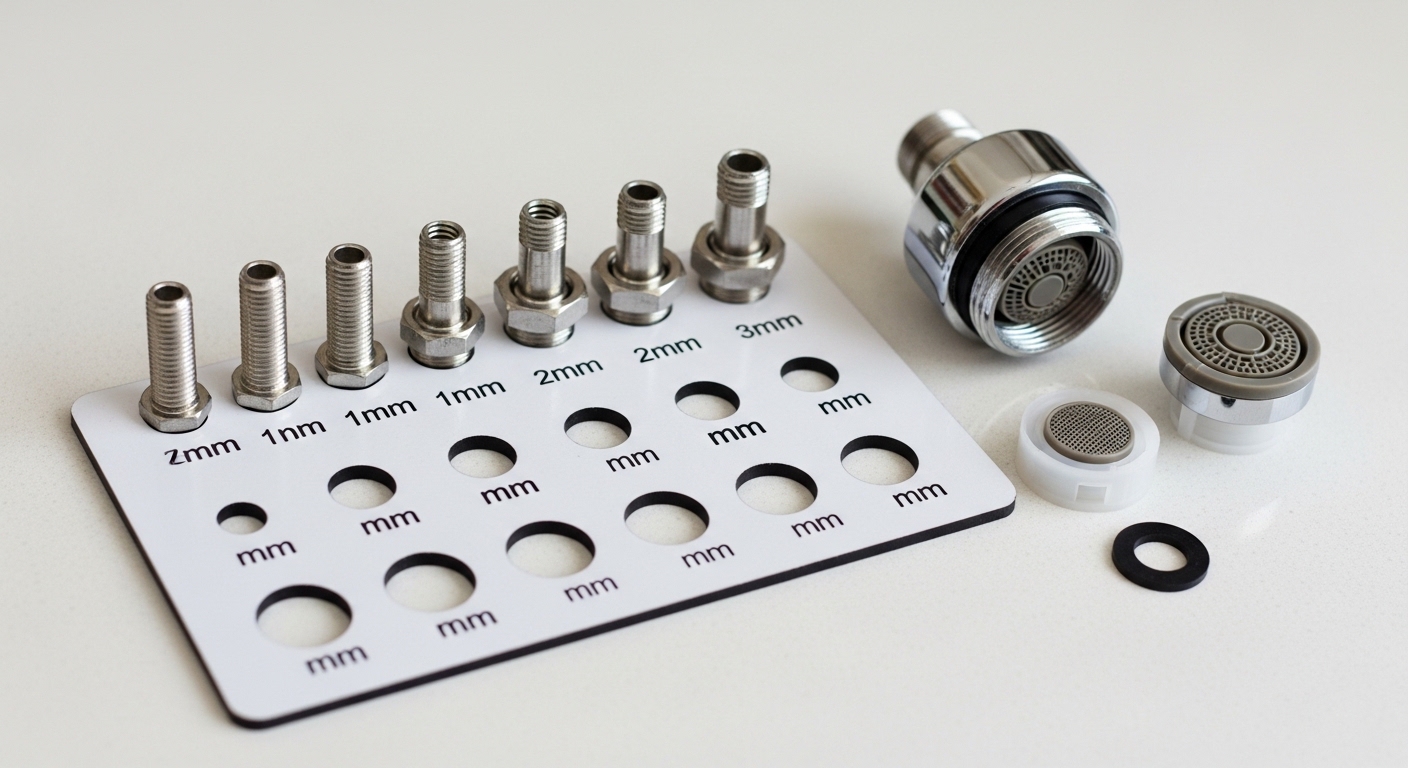
If you’ve ever unscrewed the tip of your faucet, walked into a hardware store with it in your pocket, and still bought the wrong replacement, a faucet aerator gauge is the two-dollar tool that ends that cycle. Aerators come in a maddening number of sizes and thread types, and they all look nearly identical to the naked eye. The gauge exists for one reason: to tell you precisely which size you have before you spend money on a part that won’t thread on.
At wigafaucet, we field this exact question constantly from customers who are trying to fix low flow, add a water-saving insert, or attach a hose adapter. Below is the plain-English breakdown of what the gauge is, how to read it, and how to get the right fit on the first try.
What exactly is a faucet aerator gauge, and why do you need one?
A faucet aerator gauge is a sizing template — usually a flat card or a small handheld tool — printed or molded with a set of standard aerator sizes. You test your aerator against it to identify two things: the diameter of the threads and the gender of the threads (whether the threads are on the outside of the aerator, called male, or on the inside, called female).
You need one because “faucet aerator” is not a single size. A standard North American aerator can be Regular, Junior, or Tom Thumb, and metric aerators run through common sizes like M18, M20, M22, M24, and M28. Get the diameter wrong by even a millimeter and the part either won’t start threading or will cross-thread and leak. The gauge removes the guesswork entirely.
Here’s the practical payoff: a faucet aerator gauge saves you two or three trips to the store, prevents you from stripping threads by forcing the wrong part on, and lets you confidently order the right replacement or adapter online. For anyone dealing with weak flow, this is often the first diagnostic step — before you assume the problem is deeper in the valve. If you’re chasing pressure issues specifically, our guide on why a Moen bathroom faucet has low water pressure walks through how a clogged aerator is frequently the real culprit.
How do you actually use a faucet aerator gauge step by step?
You unscrew the aerator, dry it off, and press it against each labeled opening on the gauge until you find the one it fits snugly — that label is your size. It takes about a minute. Here’s the full process so you don’t miss the thread-gender step, which is where most people go wrong.
- Remove the aerator. Turn it counterclockwise by hand. If it’s stuck with mineral buildup, wrap it in a cloth and use pliers gently, or soak the tip in white vinegar for 20 minutes first.
- Clean and dry it. Rinse off any grit and wipe it dry so you get an accurate read against the gauge.
- Determine the gender. Look at where the threads are. Threads on the outside of the aerator = male. Threads recessed inside the housing = female. The gauge has separate male and female test points for this.
- Test the diameter. Press the threaded end against the labeled holes (for female aerators) or over the labeled posts (for male aerators). The correct size is the one that seats cleanly without wobble or forcing.
- Read the label. Note the size — for example, “Regular Male,” “Junior Female,” or a metric callout like “M22 Male” / “M24 Female.”
- Match your replacement. Order the aerator, insert, or adapter listed for that exact size and gender.
One tip: keep the old rubber washer that sits inside the aerator. If your new insert doesn’t come with one, that washer is what seals the connection and stops drips at the tip.
What are the standard faucet aerator sizes the gauge measures?
The gauge measures two families of sizes: the North American named sizes (Regular, Junior, Tom Thumb) and the metric millimeter sizes used on most imported and modern faucets. Knowing which family your faucet belongs to narrows the search fast.
Here’s how the common sizes break down. Diameters are approximate because the thread crest varies slightly by manufacturer, which is exactly why a physical gauge beats a ruler.
| Size Name | Approx. Diameter | Gender | Typical Use |
|---|---|---|---|
| Regular (Male) | ~15/16″ (24 mm) | Male | Most standard U.S. kitchen & bath faucets |
| Regular (Female) | ~55/64″ (22 mm) | Female | Common on U.S. bathroom faucets |
| Junior (Male) | ~13/16″ (18.5 mm) | Male | Smaller bathroom & bar faucets |
| Junior (Female) | ~3/4″ (16.5 mm) | Female | Compact bathroom faucets |
| Tom Thumb (Male) | ~1/2″–5/8″ (15 mm) | Male | Small European & specialty faucets |
| M22 / M24 | 22 mm / 24 mm | Male or Female | Imported & modern designer faucets |
| Cache / Hidden | Varies (needs key) | Internal | Recessed aerators requiring a removal key |
Notice the trap in that table: “Regular Male” (24 mm) and “M24 Male” are essentially the same diameter, while “Regular Female” is 22 mm. Two aerators labeled “regular” won’t interchange if one is male and one is female. That single distinction is why the gauge tests gender before diameter — and why eyeballing it fails so often.
One more category worth flagging: cache or hidden aerators. These sit flush inside the spout and have no visible threads to grab. They need a small removal key (often shipped with the faucet) instead of a standard gauge read. If your spout tip looks smooth with no external threads, you likely have one of these.
Do you even need a gauge, or can you just measure the aerator yourself?
You can measure it yourself with calipers, but a gauge is faster and far more forgiving of thread-crest variation. Calipers give you a raw diameter number; they don’t tell you the standard name, the gender interplay, or whether a real part is sold in that size. The gauge maps your aerator directly to a purchasable size.
If you don’t own a gauge and don’t want to buy one, here are your realistic options:
- Bring the old aerator to the store and physically thread candidate parts onto it — tedious but works.
- Use digital calipers to measure the outer diameter (male) or inner diameter (female), then match to the table above.
- Check the faucet’s spec sheet — many manufacturers list the aerator thread size in the manual or online.
- Grab a free gauge — many aerator multipacks and plumbing kits include a paper or plastic sizing card at no extra cost.
Honestly, for a couple of dollars the physical gauge is the shortcut that pays for itself the moment it prevents one wrong purchase. If you’re the type who does your own faucet maintenance — swapping cartridges, clearing sprayers, replacing supply lines — it’s a keeper for the toolbox. Speaking of sprayers, a clogged aerator and a sticking faucet sprayer often show up together when hard water is the underlying cause, so it’s worth checking both while you’re under there.
How does the gauge help you pick an aerator for low water pressure or water savings?
Once the gauge tells you the size, you get to choose the aerator’s flow rate and spray style — and that’s where you actually fix low pressure or cut water use. The size gets you a part that fits; the flow rate and insert type determine how the water feels and how much you spend on your water bill.
Flow rate is measured in gallons per minute (GPM). Here’s how to think about the common options once you know your thread size:
- 2.2 GPM — the older U.S. standard for kitchen faucets; strong flow, higher water use.
- 1.8 GPM — a solid balance for kitchens; noticeably efficient without feeling weak.
- 1.5 GPM — common for bathroom faucets; meets most water-efficiency programs.
- 1.2 GPM or 1.0 GPM — high-efficiency inserts; meets California and WaterSense-style targets, best where you want maximum savings.
Here’s the counterintuitive part: if your faucet feels weak, a lower-GPM aerator with an aerated (air-mixed) or laminar spray can actually feel stronger than a clogged high-flow one, because it delivers a fuller, better-formed stream. A pressure-compensating aerator holds a steady flow even when household pressure dips. So the gauge isn’t just about fit — it’s the gateway to dialing in the exact water experience you want.
For a broader look at what separates a well-built fixture from a disappointing one — aerator quality included — our breakdown of what actually makes the best kitchen faucet quality is a useful companion read before you upgrade.
What’s the difference between an aerator gauge and a hose or adapter fitting?
An aerator gauge only identifies the aerator’s thread size; a hose or adapter fitting is the part you buy afterward to connect something else — a sprayer, a water filter, a garden hose — to that thread. The gauge is the measuring step; the adapter is the connecting step. People conflate the two, then order an adapter in the wrong thread and blame the adapter.
The workflow is: gauge first, adapter second. Once you know you have, say, a Regular Male 24 mm aerator, you can confidently buy an adapter rated for that thread to attach a portable dishwasher line, a countertop filter, or a hose. If connecting external equipment to your faucet is your actual goal, our explainer on what a faucet hook up adapter is and which one you need covers the matching side of this equation in detail. And if you’re working on the supply side rather than the spout tip, thread sizing matters there too — see our note on Pfister faucet water supply line sizes for how connectors differ underneath the sink.
The key mental model: the gauge answers “what do I have?” and the adapter answers “how do I connect to it?” You need the first answer to buy the second part correctly.
How do you avoid the most common aerator sizing mistakes?
The biggest mistakes all come from skipping the gender check or forcing a part that’s “close enough.” Here’s the short list of what actually trips people up, and how the gauge prevents each one.
- Assuming diameter alone is enough. Male and female aerators can share a nominal size and still not fit. Always confirm gender first.
- Cross-threading a near-miss. If a part needs force to start, stop — it’s the wrong size, and forcing it strips the housing.
- Losing the internal washer. The small rubber washer seals the joint; without it, the tip drips. Save it or buy a replacement in the kit.
- Ignoring mineral buildup. A crusty aerator can measure oddly. Clean it in vinegar before you gauge it.
- Overlooking cache aerators. No visible threads means you need a removal key, not a standard gauge read.
Do these five things and your fit rate goes to essentially 100%. The gauge exists precisely to make the first two impossible to get wrong.
Author note & brand credibility
This guide was written by the wigafaucet product team, drawing on years of hands-on work fitting, testing, and troubleshooting faucet aerators across kitchen and bathroom fixtures. We’ve matched thousands of replacement aerators for customers and stock parts across the full range of Regular, Junior, Tom Thumb, and metric sizes. Our aerators and inserts are tested against recognized flow-rate standards, and quality-tier parts we carry meet WaterSense-style efficiency targets and ship with brand-backed warranty coverage. When we recommend a sizing step, it’s because we’ve seen firsthand how many returns and stripped threads a one-dollar gauge prevents. wigafaucet specializes exclusively in faucets and bathroom fixtures — that focus is why our sizing advice is specific rather than generic.
FAQ
What is a faucet aerator gauge used for?
It’s a sizing tool that identifies your aerator’s thread diameter and gender (male or female) so you can buy the exact replacement, insert, or adapter that fits. You press the aerator against the labeled holes or posts, read the size, and match it to a new part — eliminating wrong purchases and return trips.
How do I know if my aerator is male or female?
Look at where the threads sit. If the threads are on the outside of the aerator’s tip, it’s male. If the threads are recessed inside the housing, it’s female. A faucet aerator gauge has separate test points for each, so you confirm gender before you even check diameter.
What size are most standard faucet aerators?
In the U.S., the most common sizes are Regular Male (about 24 mm / 15/16″) and Regular Female (about 22 mm / 55/64″). Bathroom and bar faucets often use smaller Junior sizes, while imported and designer faucets frequently use metric threads like M22 or M24. The gauge tells you which one you actually have.
Can a new aerator fix low water pressure?
Often, yes. A clogged aerator is one of the most common causes of weak flow, and cleaning or replacing it restores pressure instantly. If a fresh aerator doesn’t help, the issue is likely further upstream in the valve, cartridge, or supply line. Choosing a pressure-compensating or aerated insert can also make a low-GPM faucet feel stronger.
What if my faucet has no visible threads to measure?
You probably have a cache (hidden) aerator that sits flush inside the spout. These require a small removal key — usually included with the faucet — rather than a standard gauge read. Once removed, you can measure the internal insert and order a matching cache aerator.
Do I need to buy a gauge, or is there a free option?
You don’t strictly need to buy one. Many aerator multipacks and plumbing kits include a free paper or plastic sizing card. You can also use digital calipers plus a size chart, or bring the old aerator to the store to test-fit parts. That said, a dedicated gauge is faster and more accurate for the price of a coffee.