 Wiga Tap Manufacturer
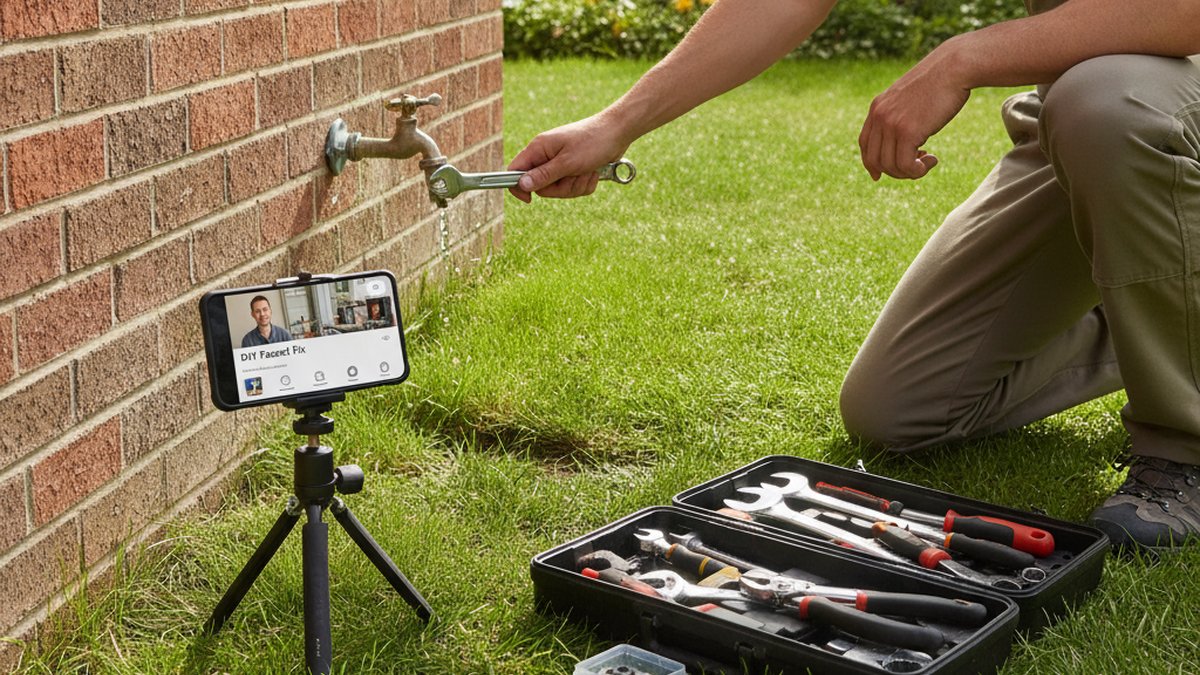
If you’ve typed “outdoor faucet repair youtube” into a search bar at 9pm because your spigot won’t stop dripping, you’re in the right place. YouTube is genuinely one of the best ways to learn this repair — but the videos rarely tell you the one thing that ruins most DIY attempts: they’re demonstrating on a different faucet than the one bolted to your house. Below we’ll walk through how to pick the right video, how to know which of the four common outdoor faucets you actually have, what parts to buy, and when to stop and call a plumber. The goal is simple — you finish the job dry, not standing in a puddle wishing you’d never touched it.
At wigafaucet, we design and pressure-test hose bibs and sillcocks to withstand 500+ freeze-thaw and burst cycles before they ship, so we spend a lot of time on exactly these failure points. Here’s the plain-English version of what actually goes wrong outside and how to fix it.
Which outdoor faucet do I actually have, and why does it change the whole repair?
Before you follow any video, identify your faucet — because a frost-free sillcock and a standard hose bib are repaired in completely different ways, and using the wrong tutorial is the single biggest reason DIY outdoor faucet repairs fail. There are four common types, and each has a signature leak point.
- Standard hose bib / spigot: A short body, handle sits close to the wall. Leaks almost always come from the rubber washer or the packing nut behind the handle.
- Frost-free sillcock: A long-bodied faucet (6″–12″ or more) common in cold climates. The valve seat is deep inside the wall, so a drip at the spout usually means a bad washer on the end of a long stem — a “frost-free faucet repair” video is what you want, not a generic spigot video.
- Ball-valve or quarter-turn hose bib: Handle turns just 90°. These rarely have washers; a leak usually means the whole cartridge or valve is shot.
- Yard hydrant (rural / well systems): Buried supply, tall stand. Repairs involve a plunger and seal deep underground — a very different video.
The fastest way to tell frost-free from standard: look at the body length and check whether water sprays back out of the handle area when the hose is off. Frost-free units also leak from behind the wall if the internal stem cracks in a freeze — that’s the scary one, because it drips inside your home instead of outside.
What are the odds a YouTube video can actually fix my outdoor faucet?
Realistically, a good YouTube tutorial can walk you through 80–90% of outdoor faucet leaks, because the vast majority are worn washers, loose packing nuts, or a failed vacuum breaker — all cheap, low-skill fixes. The 10–20% that need a pro are cracked frost-free stems inside the wall, corroded valve seats that won’t re-seat, and soldered copper connections that need to be cut and re-sweated.
Here’s an honest breakdown of what you’ll find and how reliable each fix is:
| Leak location | Most likely cause | DIY-from-YouTube difficulty | Typical part cost |
|---|---|---|---|
| Drips from the spout when off | Worn stem washer or valve seat | Easy — 20–30 min | $2–$8 |
| Water sprays from handle when on | Loose or worn packing nut / packing washer | Easy — 10 min | $3–$6 |
| Leaks from the anti-siphon cap on top | Failed vacuum breaker | Easy — 15 min | $8–$15 |
| Leaks behind the wall (frost-free) | Cracked stem or split pipe from freeze | Hard — often a pro job | $20–$200+ |
| Ball/quarter-turn drips | Failed cartridge or seals | Moderate — 30 min | $10–$25 or full replace |
Notice how many fixes are under $10 in parts. That’s why outdoor faucet repair is one of the most satisfying beginner plumbing jobs — the math heavily favors trying it yourself first.
How do I follow an outdoor faucet repair YouTube video without flooding the yard?
The safe sequence is always: shut off the water supply, relieve pressure, then follow the video step by step. The reason people flood their yard is they start unscrewing the packing nut with the water still on — and a spigot under 40–60 PSI turns into a fire hose the moment the stem comes loose. Never trust “the outside handle is closed” as your shutoff.
- Find the interior shutoff. Most outdoor faucets have a dedicated shutoff valve on the supply line inside the basement, crawlspace, or utility closet. If you can’t find one, shut off the main.
- Open the outdoor faucet to drain it. With the supply off, open the spigot fully and let the remaining water run out — this relieves pressure so nothing sprays when you loosen parts.
- Match the video to YOUR faucet type (from the section above). Search “frost-free sillcock repair” or “hose bib washer replacement,” not just “outdoor faucet repair youtube” — the more specific the search, the closer the video matches your hardware.
- Lay parts out and photograph each step as you disassemble. Order matters on reassembly, especially the washer, brass stem, packing washer, and packing nut.
- Replace, don’t just tighten. If a washer is grooved, flattened, or brittle, swap it. Reusing an old washer is why the “fixed” faucet drips again a week later.
One pro tip the videos skip: bring the old stem and washer to the hardware store rather than guessing sizes. Outdoor faucet washers come in a dozen diameters, and a washer that’s even slightly too small will weep. If your leak turns out to be on the supply line rather than the faucet, our guide on a leaking flexible hose connection covers the same compression-fitting logic that applies to outdoor lines.
Why does my outdoor faucet leak from the handle, not the spout?
If water sprays or seeps around the handle when the faucet is running, the problem is almost never the washer — it’s the packing nut or the packing (a graphite-string or rubber ring seal behind the handle). The fix is often as simple as snugging the packing nut a quarter turn with a wrench, and if that doesn’t do it, replacing the packing washer underneath.
This is the single most common “why is my new washer not fixing it” situation. People watch a washer-replacement video, swap the spout washer perfectly, and the handle still leaks — because they fixed the wrong seal. Two different seals, two different leaks:
- Drip from the spout end = stem washer / valve seat (fix with faucet off).
- Leak around the handle = packing nut / packing washer (tighten first, replace if needed).
Rusty, seized handles and corroded packing nuts are common on older spigots. If yours is so corroded the nut won’t budge, our walkthrough on removing an old, rusted, stuck faucet nut uses penetrating oil and leverage tricks that translate directly to a crusty outdoor bib. And if the whole faucet is more rust than metal, replacing it outright is usually smarter than chasing seals — the same call we walk through for a corroded rusty backyard tap setup.
Should I repair or just replace my outdoor faucet?
Replace the whole faucet if the body is cracked, the threads are stripped, it’s a non-frost-free spigot in a freezing climate, or you’ve already replaced the washer and it still leaks — otherwise, repair. A new hose bib is $12–$30, and swapping a threaded one takes about the same effort as a deep repair, so there’s a clear tipping point.
Here’s how the decision usually shakes out:
| Situation | Repair or replace? | Why |
|---|---|---|
| Worn washer, sound body | Repair | $5 part, 20 min, done |
| Standard spigot in freezing climate | Replace with frost-free | Prevents future burst pipes |
| Cracked or split body | Replace | No seal will hold a cracked casting |
| Threaded connection (screws on) | Replace — easy DIY | Unscrew old, tape threads, screw on new |
| Soldered/sweated copper connection | Replace — consider a pro | Requires torch work near the wall |
If you’re upgrading, look for a frost-free sillcock with a built-in anti-siphon vacuum breaker and a solid brass body — brass resists the mineral corrosion that eats cheaper zinc castings alive outdoors. We break down that exact material trade-off in our zinc alloy vs. stainless steel faucet comparison, and the same durability logic applies to anything that lives outside in the weather.
What tools and parts should I have ready before I hit play?
You need surprisingly little: an adjustable wrench, a screwdriver, plumber’s tape (PTFE), and a repair washer or stem assembly matched to your faucet. Having everything staged before you start the video is what keeps a 20-minute job from becoming a weekend with the water shut off.
- Adjustable wrench or channel-lock pliers — for the packing nut and stem.
- Flathead/Phillips screwdriver — the washer is usually held by a single brass screw.
- Replacement washers or a stem repair kit — bring the old part to match it exactly.
- PTFE (plumber’s) tape — for threaded connections on a full faucet swap.
- Penetrating oil — for any corroded, stuck nut.
- Bucket and rag — catch residual water; keep the work area dry so you can see the leak return (or not).
A small note on standards: look for outdoor faucets and repair parts that meet the U.S. lead-free requirements (NSF/ANSI 372, the “lead-free” law that also applies to any spigot you might drink or fill a pet bowl from). We cover why that matters even outside in our lead-free faucet guide. A vacuum breaker (anti-siphon device) is also code in most areas — it stops contaminated hose water from being siphoned back into your drinking supply.
Final walkthrough: the frost-free sillcock washer swap
For the most common frost-free repair, the fix is to unscrew the retaining nut behind the handle, pull the entire long stem straight out, replace the washer on the far end, and reinsert it — all with the water shut off inside. Because the working washer is on the far tip of a foot-long stem, this looks intimidating on video but is genuinely one of the simplest repairs once the stem is out.
- Shut off the interior supply valve and open the outdoor faucet to drain.
- Remove the handle screw and handle.
- Loosen the packing/retaining nut with a wrench.
- Pull the full stem straight out — don’t twist hard or you can crack it.
- Replace the washer (and O-ring if worn) on the end of the stem.
- Reinsert, tighten the nut, reattach the handle, restore water, and test.
If the stem itself is cracked or the leak is behind the wall, stop — that’s a freeze-damaged unit, and forcing it risks a hidden interior leak. That’s the point where a $150 plumber visit is cheaper than water damage to drywall and framing.
Author note & credibility
This guide was written by the wigafaucet product and testing team — the same people who spec, pressure-test, and freeze-cycle our hose bibs and sillcocks before they ship. Every outdoor faucet we sell is bench-tested against burst pressure and freeze-thaw cycling, built to lead-free (NSF/ANSI 372) standards, and backed by a limited lifetime warranty on the valve body. We’ve handled thousands of “why won’t my spigot stop dripping” questions, and this article reflects the fixes that actually work in the field, not just in a studio.
FAQ
Can I really fix an outdoor faucet myself just from a YouTube video?
Yes, for the most common leaks — worn washers, loose packing nuts, and failed vacuum breakers make up the large majority of outdoor faucet problems, and all are beginner-friendly with basic tools. Match the video to your specific faucet type, shut the water off first, and you’ll succeed on most jobs. Cracked frost-free stems and soldered copper connections are the main exceptions worth calling a pro for.
Why does my outdoor faucet still drip after I replaced the washer?
Usually because the leak is coming from the handle (a packing issue) not the spout (a washer issue), or because the valve seat inside the faucet is corroded and no longer lets a new washer seal flat. Check where the water actually appears: handle leaks need the packing nut tightened or repacked, and a pitted valve seat may need resurfacing or a full faucet replacement.
How do I know if I have a frost-free faucet?
Look at the body length — a frost-free sillcock is long (6″–12″+) because its shutoff valve sits deep inside the heated wall, while a standard hose bib is short and stubby. Frost-free units also often have an anti-siphon cap on top. If you’re in a climate that freezes and your faucet is short, upgrading to frost-free is the best way to avoid burst-pipe repairs.
What’s the difference between a leak at the spout and a leak at the handle?
A spout leak (dripping from the nozzle when the faucet is off) means a bad stem washer or valve seat; a handle leak (water around the handle when it’s on) means worn packing or a loose packing nut. They’re two separate seals, so fixing one won’t stop the other — always confirm where the water is coming from before you buy parts.
When should I stop and call a plumber instead of watching another video?
Stop if you see water leaking behind the wall, if the faucet body is cracked, if the connection is soldered copper you’d need a torch for, or if a corroded part won’t move even with penetrating oil and steady pressure. These situations risk hidden water damage or gas-torch work near framing, where a professional is safer and often cheaper than a flooded wall.