 Wiga Tap Manufacturer
How to Identify Where Your Kitchen Faucet Is Leaking?
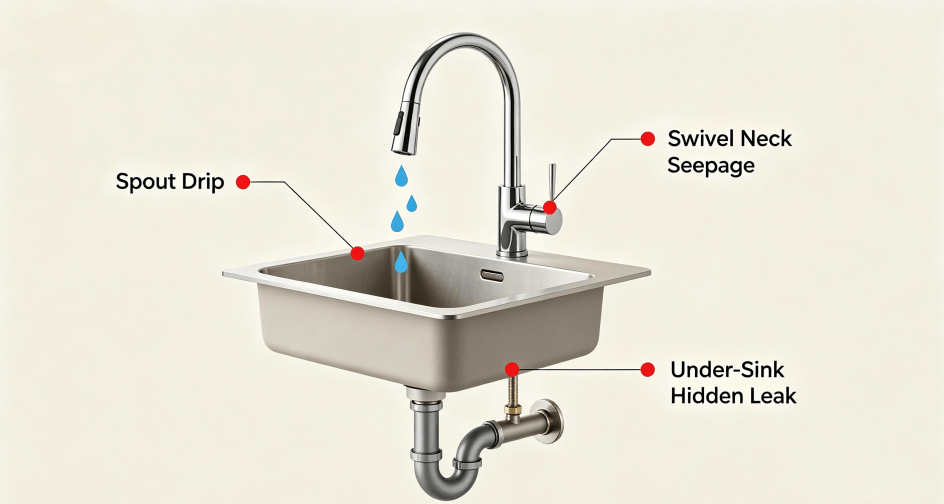
Before you take apart any parts, pinpoint the leak location first. Each leak source has a separate repair method.
Dripping water from spout after closing tap
This is the most common issue our support team receives from customers. The core cause is mineral buildup or wear on the ceramic cartridge sealing surface. Per industry standard GB 18145, basic ceramic cartridges need to pass 200,000 switch cycle tests. All WIGA kitchen faucet cartridges meet high-end industry specs that reach 500,000 cycle durability testing under lab water pressure. Hard water limescale is the main factor accelerating seal wear for all faucet cartridges.
Water seeps around the faucet neck when rotating spout
Silicone O-rings wrapped on the swivel groove will harden and crack over long-term water contact, especially in hard water areas. This leads to water pooling on the sink counter when you swing the pull-out head. Our pull down kitchen faucet collection adopts thickened food-grade silicone O-rings to extend service life and reduce leak chances.
Hidden leakage under sink with no surface dripping
Most users overlook this spot. Check supply line nuts and pull-down spray hoses for dampness, which may cause cabinet mold over time.
What Tools Do I Need to Fix a Leaky Kitchen Faucet?
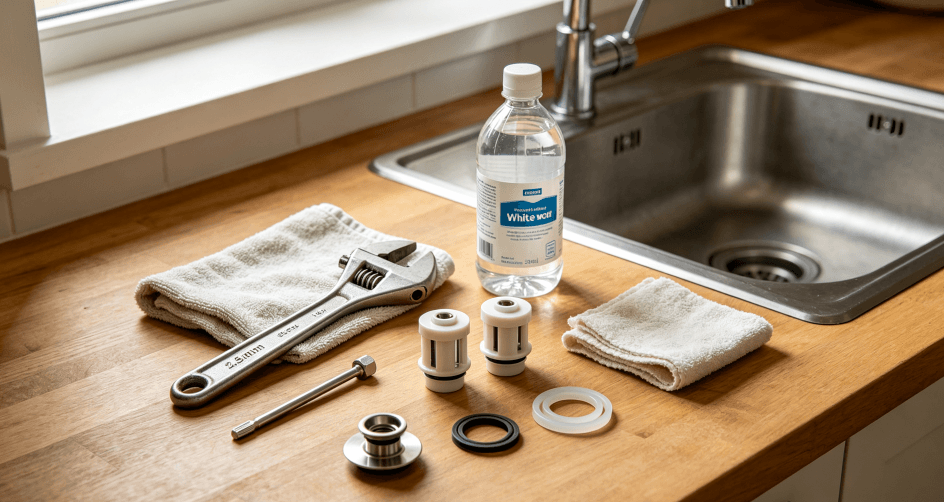
- 5mm hex key (fits most WIGA single-handle faucet set screws)
- Cloth-covered adjustable wrench (prevent scratch faucet surface finish)
- White vinegar (dissolve mineral limescale deposits)
- Matching cartridge / silicone O-ring spare parts
- Dry rags & sink stopper to avoid small screws falling down drains
For every full set WIGA kitchen mixer faucet order, we attach matched O-ring spare packs for future maintenance use.
Step-by-Step DIY Repair for Spout Dripping (Cartridge Leak)
This solution resolves most household faucet dripping cases.
- Turn off hot and cold shut-off valves under sink, open faucet fully to drain residual water inside pipes.
- Gently pry off the small hot/cold decorative cap on the faucet handle with a flat screwdriver.
- Loosen the inner hex screw, pull the handle straight upward. Do not twist hard; limescale sticks handles tight after long use.
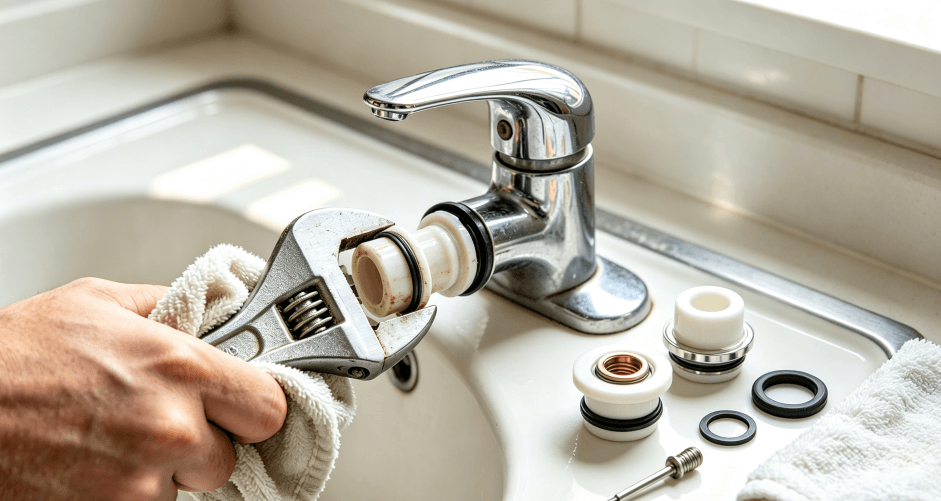
- Wrap cloth around wrench, unscrew the cartridge locking nut slowly.
- Take out the ceramic cartridge, soak in vinegar for 30 minutes if covered with white mineral buildup.
- Check the bottom sealing rubber: flat or cracked means the cartridge needs replacement.
- Align the hot/cold mark on the new cartridge and insert it into the faucet body.
- Reinstall locking nut, handle and decorative cap, turn water back on and test for drips.
Practical tip from our after-sales staff: If hot and cold water flow reverses after installation, take the cartridge out and rotate 180 degrees, then reinstall. Many customers encounter this simple assembly error.
How to Fix Base Swivel Neck Leaks?
- Close water valves and drain residual water first.
- Hold the faucet main body steady, twist the spout counter-clockwise to separate it from the neck.
- Peel off aged, cracked O-rings from the neck groove.
- Lightly coat new silicone O-rings with standard plumber grease.
- Fit O-rings back into grooves, reattach and tighten spout, then run water to check leakage.
How to Troubleshoot Hidden Under-Sink Pipe Leaks?
- Wipe all supply hoses and connecting nuts completely dry with towels.
- Turn faucet on full flow and observe all joint positions.
- If nuts seep water: tighten gently, do not apply excessive force. WIGA faucet bodies adopt forged brass; over-torque may crack threads.
- If pull-down spray hose splits or leaks, you can find compatible replacement accessories matching our kitchen faucet series.
When Should You Replace the Entire Kitchen Faucet Instead of Repairing?
Minor dripping and joint leaks can be fixed with low-cost spare parts, these scenarios suggest full replacement:
- Faucet body shows pinhole corrosion after years of use (common thin-wall zinc alloy faucets on the market)
- Internal threads damaged by repeated over-tightening during past repairs
- Faucet without standard drinking water safety certification
All WIGA kitchen faucets adopt solid lead-free brass bodies and pass NSF/ANSI 61 drinking water safety certification. Our factory was founded in 2008, with complete ISO9001, CUPC and CE quality certifications for all faucet lines.
Daily Maintenance Habits to Reduce Faucet Leak Risks
- Once per month, open and close faucet repeatedly to flush mineral residue off cartridge surfaces.
- Every six months, remove the aerator and soak in vinegar to clear limescale buildup.
- Do not squeeze the handle extremely tight when turning off water; ceramic seals do not need heavy clamping force.
- Households with hard water can install inline water filters to slow down component aging.
End actionable tip
If you cannot find matching cartridge or O-rings after disassembling your WIGA faucet, take clear photos of the parts and faucet model number, send them to our support team for spare part matching guidance.