 Wiga Tap Manufacturer
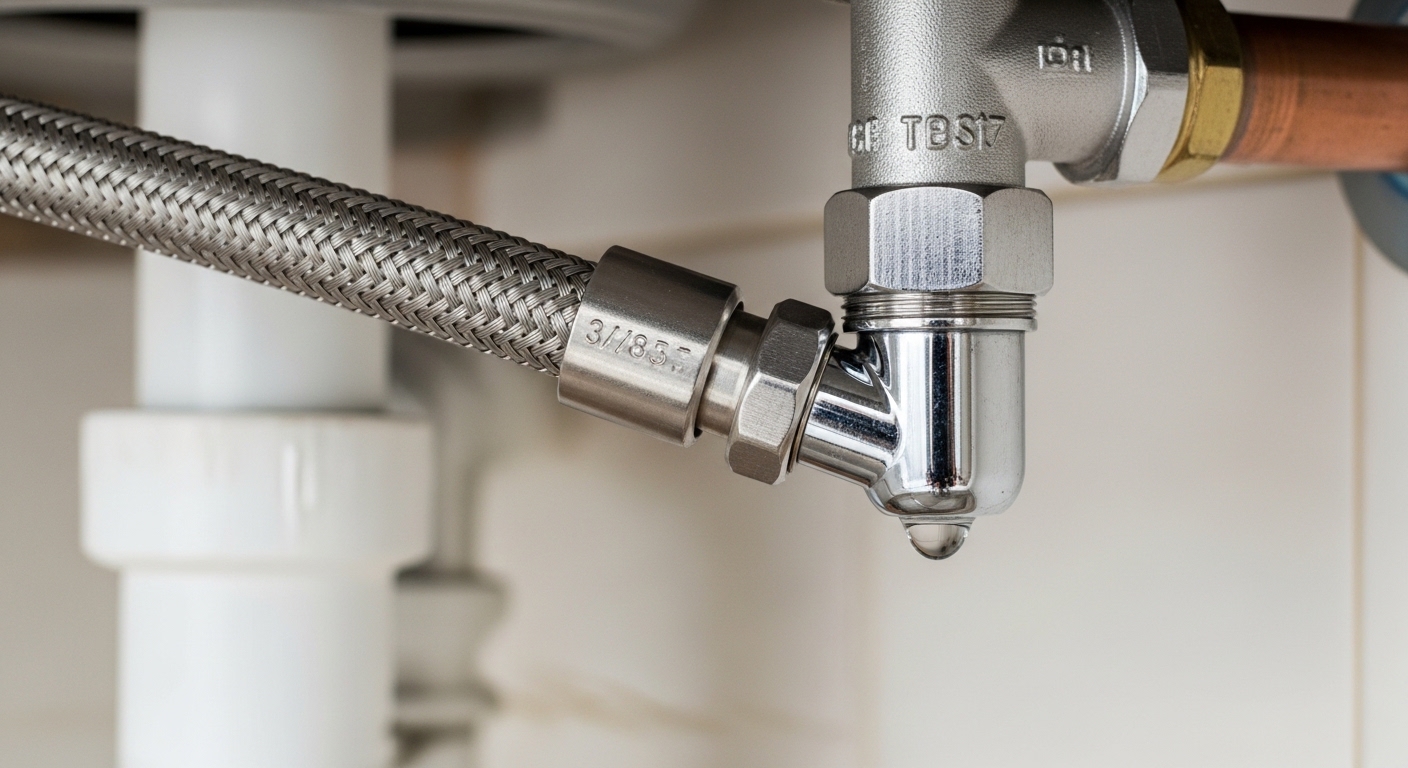
If you’ve got a leaking kitchen faucet flexible hose, you’re dealing with one of the most common — and thankfully most fixable — plumbing problems under a kitchen sink. That braided or plastic supply line running from your shut-off valve up to the faucet body (and the spray hose inside a pull-down faucet) takes constant water pressure, gets bumped by everything you shove into the cabinet, and eventually its seals give out. The good news: you rarely need a whole new faucet. You need to find which connection is weeping, and either snug it up or swap a cheap part.
Below, I’ll walk you through exactly where these hoses leak, why they fail, how to diagnose the source in five minutes, and the step-by-step repair — including when a hand-tighten is enough and when you should replace the hose outright.
Where exactly does a flexible faucet hose leak from?
A flexible hose leaks from one of three spots: the threaded connector nuts at either end, the rubber seal (gasket or O-ring) inside those connectors, or the body of the hose itself where the braid has frayed or the plastic has cracked. Ninety percent of the time it’s the connections, not the hose middle.
To understand the fix, you need to know what you’re looking at. A modern kitchen faucet usually has two or three flexible hoses:
- Supply hoses (2 of them): braided stainless steel lines carrying hot and cold water from the shut-off valves up to the faucet. These connect with 3/8″ compression fittings at the valve and typically 1/2″ or 7/16″ connectors at the faucet inlets.
- The pull-down / pull-out spray hose: a longer flexible hose (often nylon-braided or PEX) that runs from the faucet body down through the deck and connects to the sprayer wand via a quick-connect coupling. On many faucets a weight is clipped to this hose.
- Integrated faucet inlet hoses: on some single-handle faucets, short hoses come pre-attached to the faucet and join the supply lines below the deck.
Knowing which hose is leaking matters, because the repair differs. A weeping supply-line nut is a 10-second tighten. A dripping spray-hose quick-connect might just need reseating. A hose that’s split down the braid needs full replacement.
How do I find which connection is actually leaking?
Dry every connection completely with a paper towel, then run the faucet for 30 seconds and watch each joint one at a time — the first spot to bead up with water is your leak. Water travels and drips, so the puddle on the cabinet floor is almost never directly under the real source.
Here’s the five-minute diagnosis I use:
- Clear the cabinet and lay down a dry paper towel or dry cardboard across the whole base. This gives you a clean surface to spot the first drop.
- Wipe every hose and every nut bone-dry with a rag or paper towel — the shut-off valve connections, the faucet inlet connections, and the spray-hose coupling.
- Turn the water on and run it, then also turn it off and let it sit under static pressure. Some leaks only show with the faucet running (spray hose), others only under standing pressure (supply nuts).
- Feel each connection with a dry fingertip. Run your finger around the top and underside of each nut. Wetness that returns immediately after wiping = that’s your leak.
- Check the hose body by wrapping a dry paper towel around the middle of each hose for a minute. If the towel dampens away from any fitting, the hose itself has failed and must be replaced.
This is the same isolate-and-observe method that works for most under-sink leaks. If you find the water is coming from the faucet base or handle rather than a hose, that’s a different repair — our guide on how to fix a kitchen faucet leak walks through cartridge and base leaks step by step.
Why is my flexible hose leaking in the first place?
Flexible hoses leak because of five root causes: a loose nut, a worn or misseated rubber seal, over-tightening that cracked a fitting, corrosion or mineral buildup, or age-related hose failure. Knowing which one you have tells you whether to tighten, reseal, or replace.
| Cause | Telltale sign | Fix | Cost |
|---|---|---|---|
| Loose connector nut | Slow weep at the nut, no visible damage | Hand-tighten + 1/4 turn with wrench | Free |
| Worn gasket / O-ring | Persistent drip even when snug | Replace the rubber seal | $1–$5 |
| Cracked/over-tightened fitting | Steady drip, crushed or split plastic nut | Replace the hose | $8–$20 |
| Corrosion / mineral scale | White/green crust, pitting at metal fittings | Clean or replace hose + fitting | $8–$25 |
| Age / braid failure | Rust bloom, bulge, or split in the hose body | Replace the hose immediately | $8–$20 |
The most overlooked cause is over-tightening. People assume tighter = no leak, but braided supply lines seal with a rubber washer or a rubber-cone gasket, not with metal-on-metal thread pressure. Cranking the nut with pliers deforms the washer or cracks the plastic ferrule, and now you have a leak that no amount of extra torque will stop. These connections are designed to be hand-tight plus roughly a quarter turn — that’s it.
The second most common: seals simply wear out. The rubber gasket inside a supply-line coupling hardens and shrinks over 5–10 years, especially with hot water on the hot side, until it no longer compresses into a watertight seal. That’s why an old faucet that “suddenly” leaks after years of service usually just needs a fresh washer, not a new faucet.
How do I fix a leaking supply hose under my kitchen sink?
Turn off the shut-off valves, try hand-tightening the connector nut first, and if it still drips, disconnect it and replace the rubber gasket or the whole hose. Most supply-line leaks are solved in 15–30 minutes with a single adjustable wrench.
Here’s the full repair, start to finish:
- Shut off the water. Turn both shut-off valves (hot and cold) clockwise until they stop. If you don’t have under-sink valves, shut off the main. Then open the faucet to release pressure and drain the lines.
- Put a bucket and towel underneath. Even with valves closed, the hose holds water that’ll spill when you disconnect it.
- Try the free fix first. With the water off, snug the leaking nut by hand, then give it about a quarter turn with an adjustable wrench — no more. Turn the water back on and check. A surprising number of “leaks” are just a nut that vibrated loose.
- If it still drips, disconnect the hose. Hold the valve steady with one wrench and back off the nut with another so you don’t twist and crack the valve.
- Inspect the rubber seal. Look inside the coupling for the flat washer or cone gasket. If it’s flattened, cracked, brittle, or missing, that’s your culprit. Replace it with an identical washer (bring the old one to the hardware store to match).
- Check the hose for damage. Rust spots, a bulge, a kink, or fraying braid means the hose is done — replace the entire line rather than fighting it.
- Reconnect. Thread the nut on by hand first to avoid cross-threading, then hand-tighten plus a quarter turn. For threaded (non-gasketed) connections, wrap the male threads with 2–3 turns of PTFE plumber’s tape.
- Restore water slowly and watch the connection for a full minute. Then check again in a few hours, because slow weeps can take time to reappear.
When you buy a replacement, match the length and both fitting sizes. Standard kitchen supply hoses are 3/8″ compression at the valve end and 1/2″ FIP (female iron pipe) or a faucet-specific connector at the top. If your connection types don’t match up, a faucet hook up adapter lets you bridge mismatched threads without replacing the whole valve.
How do I fix a leaking pull-down spray hose?
A leaking pull-down spray hose is usually the quick-connect coupling not fully seated, a worn O-ring at the wand, or a split in the hose from repeated bending — reseat the coupling first, and if it still leaks, replace the O-ring or the hose. This is a common failure on pull-out and pull-down faucets because that hose flexes thousands of times.
Diagnose it like this: pull the wand out and run the water. If water sprays or drips from the coupling where the hose meets the wand, it’s the wand O-ring or a loose quick-connect. If the drip appears down inside the cabinet while spraying, the hose has likely cracked along a flex point or the deck-side connection is loose.
To fix it:
- Reseat the quick-connect. Disconnect the wand from the hose (usually a squeeze-clip or a threaded collar), check the O-ring for wear, then firmly reconnect until it clicks or seats fully. A partial connection is the #1 cause of spray-hose drips.
- Replace the wand O-ring if it’s flat or nicked — these are sold in faucet repair kits for a couple dollars, and matching your brand (Moen, Delta, Kohler, Wiga) ensures the right size.
- Replace the whole spray hose if it’s split. Most pull-down hoses are a modular part you can order by faucet model; feed the new hose through the deck, reconnect the weight, and couple it to the wand.
If your faucet’s problem is the sprayer not retracting or the diverter sticking rather than leaking, that’s a mechanical issue — see our fix for a sticking faucet sprayer. And if you notice weak flow alongside the leak, mineral buildup may be involved; our guide on low flow out of a kitchen faucet covers that.
Should I repair the hose or replace the whole faucet?
Replace the hose, not the faucet — in almost every case. A flexible supply hose or spray hose is a wear part designed to be swapped, costs $8–$20, and takes 20–30 minutes. Replacing the entire faucet only makes sense if the faucet body itself is cracked, the finish is failing, or the faucet is 15+ years old and you were planning to upgrade anyway.
Here’s the honest decision framework:
| Situation | Best move |
|---|---|
| Loose nut, weeping connection | Tighten — free |
| Worn washer/O-ring, hose in good shape | Replace the seal — a few dollars |
| Cracked, rusted, or bulging hose | Replace the hose — $8–$20 |
| Faucet body cracked or corroded through | Replace the faucet |
| Faucet is old + you want an upgrade | Replace the faucet (new hoses included) |
One important note on braided stainless supply lines: they don’t last forever. Industry guidance and most manufacturer warranties suggest inspecting them every few years and replacing them proactively around the 5–8 year mark, because a burst supply line under full household pressure can flood a kitchen fast. If you’re already under the sink fixing one leak and the other hose looks old, replace both. It’s cheap insurance.
Can I prevent my flexible hose from leaking again?
Yes — don’t over-tighten, use quality braided stainless hoses instead of cheap plastic ones, keep the cabinet clear so hoses aren’t crushed or kinked, and inspect the connections once a year. Most repeat leaks come from the same avoidable mistakes.
A few practical habits that keep flexible hoses leak-free:
- Hand-tight plus a quarter turn — never gorilla-tight. Gasketed connections seal with rubber compression, not brute torque.
- Buy braided stainless steel supply lines, not the thin white plastic ones. Braided lines resist bursting and last far longer, and the price difference is a few dollars.
- Don’t kink the spray hose. Make sure the hose weight moves freely and nothing in the cabinet blocks the hose’s travel path.
- Leave breathing room around the hoses. Pots and cleaning bottles jammed against a connection can slowly loosen or abrade it.
- Add a leak detector. A $10 battery water sensor on the cabinet floor will alert you to a slow weep before it becomes water damage.
- Inspect annually. Sixty seconds with a flashlight and a paper towel around each fitting once a year catches problems early.
If your leak turned out to be at the handle or base rather than the hose, or if you’re chasing a drip on the bathroom side, we’ve got dedicated repair guides for a leaking bathroom sink faucet handle too.
FAQ
Can I use plumber’s tape on a braided flexible faucet hose?
Only on threaded, metal-to-metal connections — wrap 2–3 clockwise turns of PTFE tape on the male threads. Do NOT use tape on connections that seal with a rubber washer or cone gasket (most supply-line couplings), because the rubber does the sealing and tape can actually prevent it from seating properly.
How tight should a flexible supply hose nut be?
Hand-tight, then about a quarter turn with a wrench. If it still weeps, the problem is a worn washer or damaged fitting — not insufficient tightness. Over-tightening cracks plastic ferrules and crushes rubber seals, which causes leaks rather than stopping them.
Why is my faucet hose leaking only when the water is running?
That points to the pull-down spray hose or a downstream connection that only sees flow pressure when the faucet is open. Pull the wand out, run the water, and check the quick-connect coupling and wand O-ring — a partially seated coupling is the usual cause.
How long do braided stainless steel supply hoses last?
Typically 5–10 years, though quality braided lines can go longer. Because a burst supply line can flood a kitchen, most plumbers recommend proactively replacing them every 5–8 years, and immediately if you see rust bloom, a bulge, or fraying in the braid.
Is a small drip from the flexible hose an emergency?
Not an immediate emergency, but don’t ignore it. A slow weep causes cabinet rot, mold, and warped flooring over time, and braided lines can fail suddenly under pressure. Fix or replace a leaking hose within a few days, and shut the supply valve in the meantime if the drip is steady.
Do I need to turn off the water main to replace a faucet hose?
Usually no — just close the under-sink shut-off valves (turn clockwise until they stop) for that fixture. Only shut off the main if your sink lacks working shut-off valves or the valves themselves are leaking. Always open the faucet afterward to relieve pressure before disconnecting anything.
Author note: This guide was written by the Wiga faucet repair team, drawing on hands-on experience diagnosing and replacing kitchen faucet supply lines and pull-down spray hoses across dozens of faucet models and brands. We repair and pressure-test these components as part of our own product development, so the steps here reflect what actually works at the sink, not just theory.
About Wiga: Wigafaucet designs and manufactures kitchen and bathroom faucets and fixtures built to modern flow and durability standards. Our faucet supply hoses and spray hoses are pressure-tested and backed by our product warranty, and every fixture is engineered to meet standard connection sizes so replacement parts are easy to source. For product-specific hose replacements, always check your model’s warranty terms and use manufacturer-matched parts to keep your coverage valid.