 Wiga Tap Manufacturer
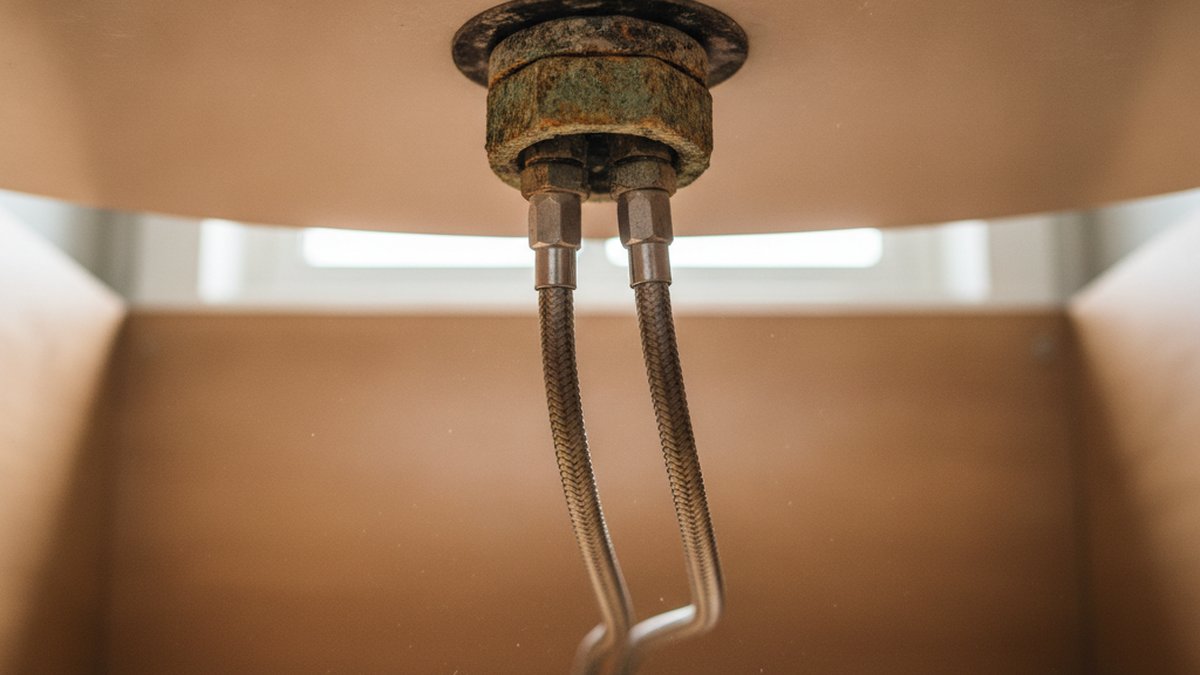
Learning how to remove old faucet nut hardware is really about winning a fight in a space the size of a shoebox, in the dark, upside down, against a fastener that’s been corroding for 15 years. The nut itself is simple — it’s the location and the rust that make it miserable. Below I’ll walk you through the exact tools, the order of operations, and the escalating tricks (penetrating oil, heat, nut splitter, cutting) that get a seized nut off without you cracking the sink or giving up and calling a plumber.
What tools do I actually need to remove a faucet mounting nut?
You need a basin wrench, penetrating oil, and adjustable pliers — that’s the core kit for 90% of faucets. The basin wrench is the non-negotiable one: its long shaft and pivoting jaw are the only practical way to reach a nut wedged 12–16 inches back behind the basin where no normal wrench fits.
Here’s the full lineup, in the order you’ll reach for it:
- Basin wrench (10–17 in.): the hero tool. The self-adjusting jaw grabs the nut from below and the T-handle gives you leverage.
- Penetrating oil (PB Blaster, Kroil, or WD-40 in a pinch): breaks the corrosion bond on metal nuts.
- Channel-lock / tongue-and-groove pliers: great for the big plastic wing-nuts on modern faucets you can reach by hand.
- Flashlight or headlamp: you cannot fight what you can’t see.
- Bucket and towels: the supply lines will drip.
- Escalation tools (only if it’s seized): a nut splitter, an oscillating multi-tool with a metal blade, or a mini hacksaw.
One tip most guides skip: modern faucets from the last 10–15 years often use a plastic mounting nut with molded wings you can spin off by hand — no basin wrench needed. Reach up and feel the nut first. If it’s plastic and turns, you may be done in 30 seconds. If it’s metal and welded in place by rust, settle in.
How do you loosen a rusted faucet nut that won’t budge?
Soak it in penetrating oil for at least 15 minutes, then apply steady counterclockwise pressure with a basin wrench — not sudden jerks. Rust bonds the threads together, and penetrating oil wicks into that bond and breaks it, but only if you give it time to work. Most people spray it and yank two seconds later; that’s why it fails.
Work through these steps in order, escalating only if the previous one fails:
- Turn off the water and disconnect the supply lines. Close both shutoff valves under the sink, open the faucet to release pressure, then unthread the supply hoses from the faucet shanks with your pliers. Have a towel ready.
- Douse the nut in penetrating oil. Coat the threads where the nut meets the shank. Wait 15–30 minutes. For a badly rusted nut, reapply every 10 minutes and wait a full hour — patience beats muscle here.
- Position the basin wrench. Slide the jaw onto the nut so it bites when you turn counterclockwise (lefty-loosey). Remember: you’re working upside down looking up, so the direction feels reversed — turn the handle so the top of the nut moves toward the back of the cabinet.
- Apply firm, steady torque. Lean into it slowly. If it slips, reseat the jaw and try again. Short controlled pulses often crack it loose where one big heave won’t.
- Tap to shock the corrosion. Still stuck? Gently tap the nut with a small hammer to vibrate the rust bond loose, re-oil, and try again.
If the nut turns even a hair, keep going — once it breaks free the first quarter-turn, the rest usually spins off. If it won’t move at all after a good soak, stop forcing it and move to heat or cutting before you snap something you can’t replace.
Should you use heat, a nut splitter, or just cut it off?
Cut it off — cutting is the fastest, safest bet for a truly seized metal nut, because the mounting nut is disposable and your new faucet comes with its own. Heat and nut splitters work too, but each has a catch you should know before you pick one.
Here’s how the three destructive methods compare:
| Method | Best for | Speed | Watch out for |
|---|---|---|---|
| Cutting (oscillating tool / hacksaw) | Rusted metal nuts on old faucets you’re replacing | Fast (2–5 min) | Don’t nick the sink, countertop, or supply lines; wear eye protection |
| Nut splitter | Round metal nuts where you have clearance | Medium | Needs room to fit the tool; slow ratcheting in tight spaces |
| Heat (heat gun / small torch) | Metal-on-metal seizing, no plastic nearby | Medium | Fire risk near cabinets and hoses; never use flame near plastic or supply lines |
My default for a stuck steel or brass nut: an oscillating multi-tool with a bi-metal blade. Slice through the nut vertically in one or two spots, then it peels off the shank. Because you’re replacing the whole faucet anyway, sacrificing the old nut costs you nothing. Just protect the sink surface and keep the blade clear of the copper or braided supply lines.
Save heat for last. Open flame under a wooden vanity is a real fire hazard, and if any part of the assembly is plastic (many are), you’ll melt it into a worse mess. A heat gun is safer than a torch, but still keep it away from braided supply hoses and the cabinet walls. If you’ve already dealt with corrosion elsewhere in the bathroom — the kind covered in our guide on how to fix rusty bath taps — you know how aggressively rust can weld metal together, and why cutting is often the humane choice.
What’s the difference between removing a bathroom faucet nut vs. a kitchen faucet nut?
The technique is identical, but kitchen faucets are harder because they sit deeper, have more connections, and often add a sprayer hose and a locking bracket. Bathroom faucets are usually a simpler two-shank, two-nut affair you can reach more easily.
The real differences to plan for:
- Depth and access: Kitchen sinks are bigger and deeper, so the nut sits farther back. A longer basin wrench or a telescoping one helps.
- Extra hoses: Pull-down and pull-out kitchen faucets have a spray hose (and sometimes a quick-connect and a weight) you must disconnect before the faucet lifts out.
- Mounting style: Many kitchen faucets use a single mounting nut on a central shank, sometimes with a horseshoe bracket and screws instead of a classic hex nut.
- Supply-line surprises: If you find the supply line itself is the problem, not the nut, our walkthrough on a kitchen faucet leaking from the flexible hose covers what to check.
For a full kitchen faucet swap where the nut is only one obstacle, the sequence in our step-by-step kitchen faucet repair guide shows how the mounting nut fits into the larger job. And if your faucet uses knobs or handles that also need to come off first, the bathroom faucet knob replacement guide covers that upstream step.
How do you remove a faucet nut without a basin wrench?
You can, but only in easy cases — use large tongue-and-groove pliers for plastic wing-nuts you can reach, or a specialty faucet-nut socket wrench for standard nuts with clearance. For a deep, rusted metal nut you genuinely can’t reach, there’s no honest substitute; borrow or buy a basin wrench, or cut the nut off.
Improvised approaches that sometimes work:
- Channel-lock pliers on plastic mounting nuts within arm’s reach — this is the most common no-wrench win.
- A faucet/sink installer wrench (the plastic multi-socket tool) that fits several common nut sizes.
- A hammer and flathead screwdriver tapped against the flats of a metal nut to walk it loose counterclockwise — rough, but it can crack a stubborn one.
Honestly, though, a basin wrench costs about $10–20 and turns a two-hour knuckle-scraping ordeal into a 10-minute job. If you plan to touch plumbing more than once in your life, buy one. It pays for itself the first time you avoid the alternative of cutting into a nut in the dark.
How do you avoid a seized faucet nut next time?
Apply a thin coat of plumber’s grease or anti-seize to the threads when you install the new faucet, and choose corrosion-resistant materials. A little prep now means the next person — maybe future you — can spin the nut off by hand instead of cutting it.
A few habits that prevent the whole ordeal:
- Grease the threads on install. A dab of silicone plumber’s grease keeps water out of the thread bond so rust never gets a foothold.
- Prefer plastic or stainless mounting hardware. Quality faucets ship with plastic wing-nuts or stainless nuts precisely because they don’t fuse to the shank the way cheap zinc or steel does.
- Fix drips fast. A slow leak keeps the nut permanently wet, which is exactly how a nut welds itself on over years.
- Buy better materials. The zinc alloy vs. stainless steel faucet comparison explains why the metal you choose today decides how easy this job is in 2036.
This is the part where good faucet engineering pays off. At wigafaucet, we spec our mounting kits with corrosion-resistant hardware and pre-lubricated threads specifically so the removal you just did doesn’t happen to the next owner.
FAQ
What size is a standard faucet mounting nut?
There’s no single size — bathroom faucet mounting nuts commonly run around 1 inch to 1-1/4 inch across, and kitchen nuts can be larger. That’s exactly why a self-adjusting basin wrench beats a fixed socket: it grips whatever’s up there without you measuring in the dark.
Can I reuse the old mounting nut on my new faucet?
No, and you don’t need to. Every new faucet ships with its own mounting nuts, gaskets, and hardware sized to its shanks. That’s why cutting off a seized old nut is guilt-free — you were going to throw it away regardless.
Will penetrating oil damage my sink or supply lines?
It won’t harm chrome, stainless, or porcelain, but wipe up drips because it’s slippery and can stain a wood cabinet base. Keep it off the rubber gaskets you plan to reuse, and let it fully evaporate before you handle braided supply lines so your grip doesn’t slip.
What if the whole faucet shank spins when I turn the nut?
Hold the faucet body still from above while you turn the nut below — grab the spout or base topside with one hand (or a helper’s) so the shank can’t rotate. If it still spins, the faucet is just loose in the hole, and cutting the nut is usually the cleanest exit.
Do I need to turn off the main water supply, or just the shutoff valves?
The two shutoff valves under the sink are enough for a faucet job in almost every case. Only shut off the main if those valves are corroded, leaking, or won’t fully close — a common discovery on old plumbing, and a good reason to test them before you start.
How long should the whole job take?
A cooperative plastic nut: 5–10 minutes. A typical metal nut with a basin wrench: 20–30 minutes. A fully rusted, seized nut you have to cut or heat: budget an hour, mostly spent waiting on penetrating oil and working slowly in a tight space.
The bottom line
Removing an old faucet nut comes down to matching your effort to the enemy: hand-spin the easy plastic ones, basin-wrench the standard metal ones after an oil soak, and cut or heat the truly seized ones without hesitation. Because the mounting nut is always replaced with the new faucet, you never have to save it — which means you always have a way out. Knowing how to remove old faucet nut hardware confidently is what separates a 15-minute swap from an all-day fight, and now you’ve got every escalation step in order.
Author note: This guide was written by the wigafaucet fixtures team, drawing on hands-on faucet installation and removal across bathroom and kitchen setups. Wigafaucet designs and tests faucets and mounting hardware to standard plumbing thread specs, and our fixtures are backed by a manufacturer warranty — we build the removal-friendly hardware we recommend here, and we stand behind it when the next replacement comes around.