 Wiga Tap Manufacturer
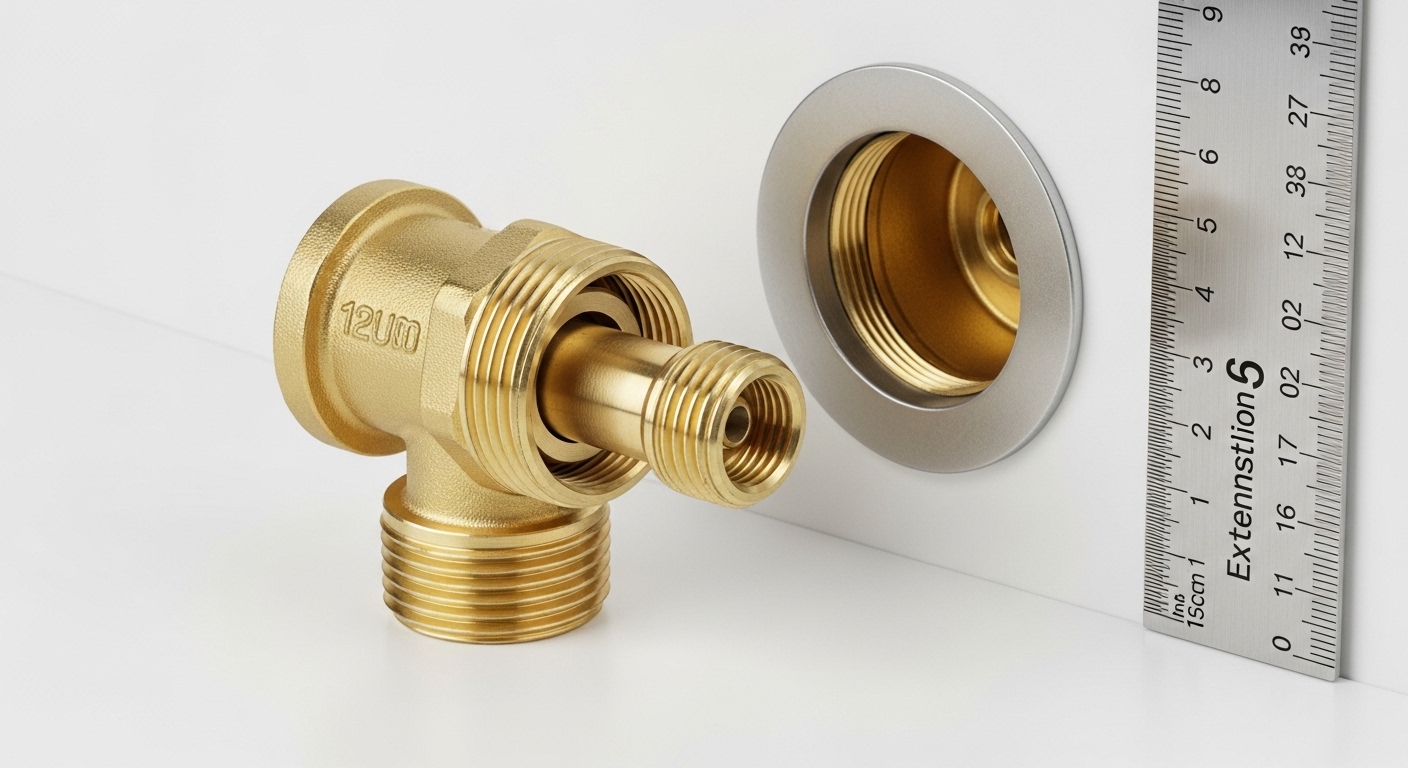
If your handle spins loose, sits proud of the wall, or won’t reach the valve at all after a remodel, a tap valve extender is almost always the fix you’re looking for. It’s one of those tiny plumbing parts nobody thinks about until a tiler adds 12 mm of backer board and tile over a concealed valve — and suddenly the tap handle is floating half an inch away from where it used to bite. This guide walks through exactly what an extender does, how to size one correctly the first time, when to use an extender versus replacing the whole valve, and which materials actually hold up under daily use.
At wigafaucet, we ship these parts by the thousands to plumbers and DIYers, and the number-one reason people order the wrong one is simple: they measure the hole in the wall instead of the valve stem. We’ll make sure that doesn’t happen to you.
What exactly does a tap valve extender do?
A tap valve extender lengthens the exposed portion of a tap or valve stem so the handle can sit at the finished wall surface instead of buried behind it. In plain terms: the working guts of the valve stay put, and the extender just carries the “turn” outward to where your hand and handle actually are.
Picture a concealed shower valve or a wall-mounted tap. The valve body is fixed in the wall, and its stem (or spindle) originally poked out just far enough to accept a handle flush against the old surface. The moment you add tile, cement board, cladding, or even a thicker escutcheon, that stem is now too short. The extender threads onto or slides over the existing stem, adds the missing length, and gives the handle a fresh point to grip.
There are three broad styles you’ll run into:
- Threaded spindle extenders — a male/female brass coupler that screws onto the valve stem. Most common for compression and quarter-turn ceramic-disc valves.
- Broach/spline adapters — for valves where the handle grips a splined (toothed) shaft. The extender copies that spline on both ends.
- Sleeve or “top-hat” extensions — a hollow tube that surrounds the stem and pushes the escutcheon and handle outward, used on many concealed mixer cartridges.
Get the style wrong and the part simply won’t engage — which is exactly why measuring matters more than guessing.
How do I know if I actually need an extender or a whole new valve?
You need an extender if the valve itself works fine and the only problem is reach — the handle wobbles, sits too far out, or the stem disappeared behind new tile. You need a new valve (or cartridge) if the tap drips, is stiff, grinds, or leaks internally, because an extender can’t fix a worn seat or a failed cartridge.
Here’s the quick self-check we give customers over the phone:
- Pull the handle off. Can you turn the water fully on and off using the bare stem with pliers? If yes, the valve is healthy — you likely just need length.
- Is the stem recessed relative to the finished wall by more than about 5 mm? If yes, an extender is the right call.
- Does water weep from around the stem or won’t shut off completely? That’s a cartridge/seat problem — extending it just relocates a leaking valve further out. Replace or rebuild first.
If your issue is really a diverter that stopped sending water to the sprayer rather than a reach problem, that’s a different part entirely — our guide on the sink sprayer diverter valve covers that scenario in detail. And if you’re wrestling with a completely seized outdoor tap, extending it won’t help; see what to do with a jammed outdoor tap instead.
How do I measure for the right tap valve extender size?
Measure the valve stem thread and the gap you need to bridge — not the hole in the wall. You need three numbers: the stem thread size, the stem profile (round thread vs. spline), and the extension length required to bring the handle to the finished surface.
Walk through it in this order:
- Shut off the water at the isolation valve or main. Always. An exposed stem under pressure is not the time to experiment.
- Remove the handle and escutcheon. Usually a grub screw under a cap, or a set screw behind the lever.
- Identify the thread. Most UK/EU-style valves use 1/2″ BSP on the body; the stem itself is often a fine thread or a splined broach. Take a photo and a caliper reading of the outside diameter.
- Measure the shortfall. Hold a straightedge across the finished wall and measure from the top of the stem to that line. That distance — plus a few millimeters so the handle seats — is your extension length.
- Check clearance. Make sure the longer stem won’t foul the escutcheon or handle skirt.
Extenders are commonly sold in 10 mm, 15 mm, 20 mm, 25 mm, 30 mm, and 40 mm lengths, and many are trimmable. When in doubt, order slightly longer and cut down — you can’t add length you didn’t buy.
Which type of tap valve extender is right for my setup?
Choose by valve type: threaded extenders for compression and traditional taps, spline/broach adapters for lever cartridges, and sleeve extensions for concealed mixer bodies. The table below lines them up against real scenarios.
| Extender type | Best for | Typical length range | Material to insist on | Difficulty |
|---|---|---|---|---|
| Threaded spindle extender | Compression taps, traditional cross-head taps, garden/utility valves | 10–40 mm | Solid brass, chrome-plated | Easy |
| Spline / broach adapter | Quarter-turn ceramic-disc levers, single-lever cartridges | 10–30 mm | Brass with matched broach count | Moderate |
| Sleeve / top-hat extension | Concealed shower & wall mixer valves after tiling | 15–50 mm (often brand-specific) | Brass sleeve + brass fixings | Moderate to hard |
| Universal kit (multi-adapter) | Unknown or mixed valve types, landlords, service vans | Assorted | Brass core, avoid all-zinc kits | Easy |
One honest caveat on universal kits: they’re brilliant for common round-thread and popular splined valves, but concealed brand-name mixers (think proprietary cartridges from major faucet makers) frequently need the manufacturer’s own extension kit. Trying to force a generic sleeve onto a proprietary cartridge is where DIY jobs go sideways. If you’re working on a wall setup from scratch, our guide to the wall mount faucet mixer explains how valve depth is designed in — worth reading before you tile.
Why does the material matter — is brass really worth it?
Yes. Buy brass, not zinc alloy. A tap valve extender lives in a warm, humid, constantly wet environment, and cheap zinc (sometimes called “mazak” or pot metal) corrodes, seizes, and can crack under the torque of a stiff handle within a year or two. Brass resists dezincification, threads cleanly, and takes a chrome or brushed finish that survives.
Here’s what separates a part that outlives the tap from one you’ll be replacing next winter:
- Solid brass body — not brass-plated zinc. A magnet won’t stick to brass; it will drag slightly on zinc-based parts.
- Rolled or cleanly machined threads — sloppy threads strip when you apply real turning force.
- A stainless or brass grub screw — the tiny screw that locks the handle is the first thing to rust on bargain parts.
- An O-ring where the sleeve meets the escutcheon on concealed types, to keep splash-back out of the wall.
This is the same logic we push everywhere on the site: the cheapest fixture part is almost never the least expensive one over its life. Our dealers make the case bluntly in why you should never buy cheap bathroom fixtures — and a valve extender is a textbook example, because replacing one means pulling the handle apart all over again.
How do I install a tap valve extender step by step?
Installation takes about 15–30 minutes with basic tools once the water is off. The core sequence is: isolate water, remove handle, thread on the extender, refit the handle, and test. Here’s the full method.
- Isolate the water supply at the service valve or main, then open the tap to release residual pressure.
- Remove the handle by loosening the grub or set screw. Lift the escutcheon or wall plate off.
- Clean the exposed stem threads. Wipe away old grease, limescale, and PTFE tape residue so the extender seats fully.
- Wrap a couple of turns of PTFE tape on the male thread if the fit is metal-to-metal, and hand-thread the extender onto the stem until snug. Don’t over-torque a brass coupler — snug plus a nudge is enough.
- For sleeve types, slide the sleeve over the stem, then fit the extended escutcheon and any supplied longer screws.
- Refit the handle onto the new outer end and tighten the grub screw. Check that “off” is fully off and “on” reaches full flow.
- Restore the water and test through several full open/close cycles, watching for weeping around the stem or handle wobble.
If, while you’re in there, you notice the handle is stiff or the tap won’t shut off cleanly, stop and address the cartridge — extending a failing valve just guarantees a repeat job. For RO drinking-water taps specifically, the fix is usually a cartridge swap, not an extender; see our reverse osmosis faucet cartridge replacement walkthrough.
Where do people go wrong with tap valve extenders?
The most common mistakes are measuring the wall hole instead of the stem, buying zinc to save a few dollars, and over-extending so the handle protrudes awkwardly. Each one sends you back to the store.
A few field-tested pointers:
- Don’t guess the thread. A 1/2″ BSP is not the same as a 15 mm metric, and they’ll cross-thread. Measure and, if unsure, bring the old handle and a photo.
- Mind the handle depth. Adding 30 mm of stem but keeping a shallow handle can leave the grub screw with nothing solid to bite. Match extension length to how deep your handle socket is.
- Check for a stop-collar. Some quarter-turn cartridges have a rotation stop; the extender must preserve the same clocking so “on” and “off” still line up with the handle graphics.
- Seal against splash. On concealed valves, water that gets behind the escutcheon and into the wall causes far more damage than a slightly stiff handle. Use the supplied O-rings.
If your handle or aerator is fighting you before you even reach the valve, our guide on faucet aerator key removal covers the small-tool tricks that stop you from scratching a finish.
FAQ
Can I use a tap valve extender on any faucet?
Not universally. Threaded and splined extenders cover the vast majority of compression taps and standard lever cartridges, but many proprietary concealed mixers require the manufacturer’s own extension kit. Identify your valve type and thread first; if it’s a branded concealed cartridge, check whether a matched kit exists before buying generic.
How long can a tap valve extender safely be?
Most jobs sit in the 10–40 mm range, and that’s the sweet spot for rigidity. Beyond roughly 40–50 mm, a single extender can flex or create leverage that stresses the valve, so for very deep build-outs use a purpose-made long sleeve kit rather than stacking couplers. Never chain two short extenders together to reach length — the joint becomes a weak point.
Will an extender fix a dripping or stiff tap?
No. An extender only adds reach; it does nothing for a worn seat, a failed ceramic disc, or a stiff cartridge. If the tap drips or won’t shut off fully, repair or replace the valve or cartridge first, then extend if you still need the length after tiling.
What’s the difference between a valve extender and a tap stem extension?
They’re the same idea under different names. “Tap valve extender,” “tap extender,” “spindle extension,” and “valve stem extension” all describe a part that lengthens the exposed valve shaft so the handle reaches the finished surface. Terminology varies by region and by manufacturer, but the function is identical.
Do I need to turn off the water to fit one?
Yes, always. Even though the valve body stays in place, you’re removing the handle and working on a stem that can be under pressure. Isolate at the service valve or main, open the tap to relieve pressure, then work. It takes 30 seconds and prevents a soaked bathroom.
Are brass extenders worth the extra cost over zinc?
For a wet, high-torque part, absolutely. Solid brass resists corrosion and dezincification, threads cleanly, and won’t crack under a stiff handle. Zinc-alloy extenders are cheaper up front but frequently seize or fail within a year or two — and replacing one means dismantling the handle all over again, which erases any saving.
A note on our testing and who wrote this
This guide was written by the wigafaucet product team, drawing on component specs and return-data from thousands of valve and extender orders shipped to plumbers and homeowners. We bench-test the extenders we stock for thread accuracy, torque tolerance, and corrosion resistance, and we prioritize solid-brass parts that align with common 1/2″ BSP and metric valve standards. Fixtures and repair components sold through wigafaucet are backed by our standard warranty; if a part doesn’t fit or fails prematurely, our support team helps you match the correct thread and length rather than leaving you to guess. As always, if the underlying valve is leaking rather than simply too short, replace or rebuild it first — an extender is a length fix, not a leak fix.